
ASSIGNMENT 1: Translating a Sketch to a Story
The assignment begins with a hand sketch of the pavilion and then uses AI image generation to produce images that follow the sketch. A design narrative explains the story of the pavilion.
TOOLS
RunDiffusion, Vectorworks, Photoshop, Claude
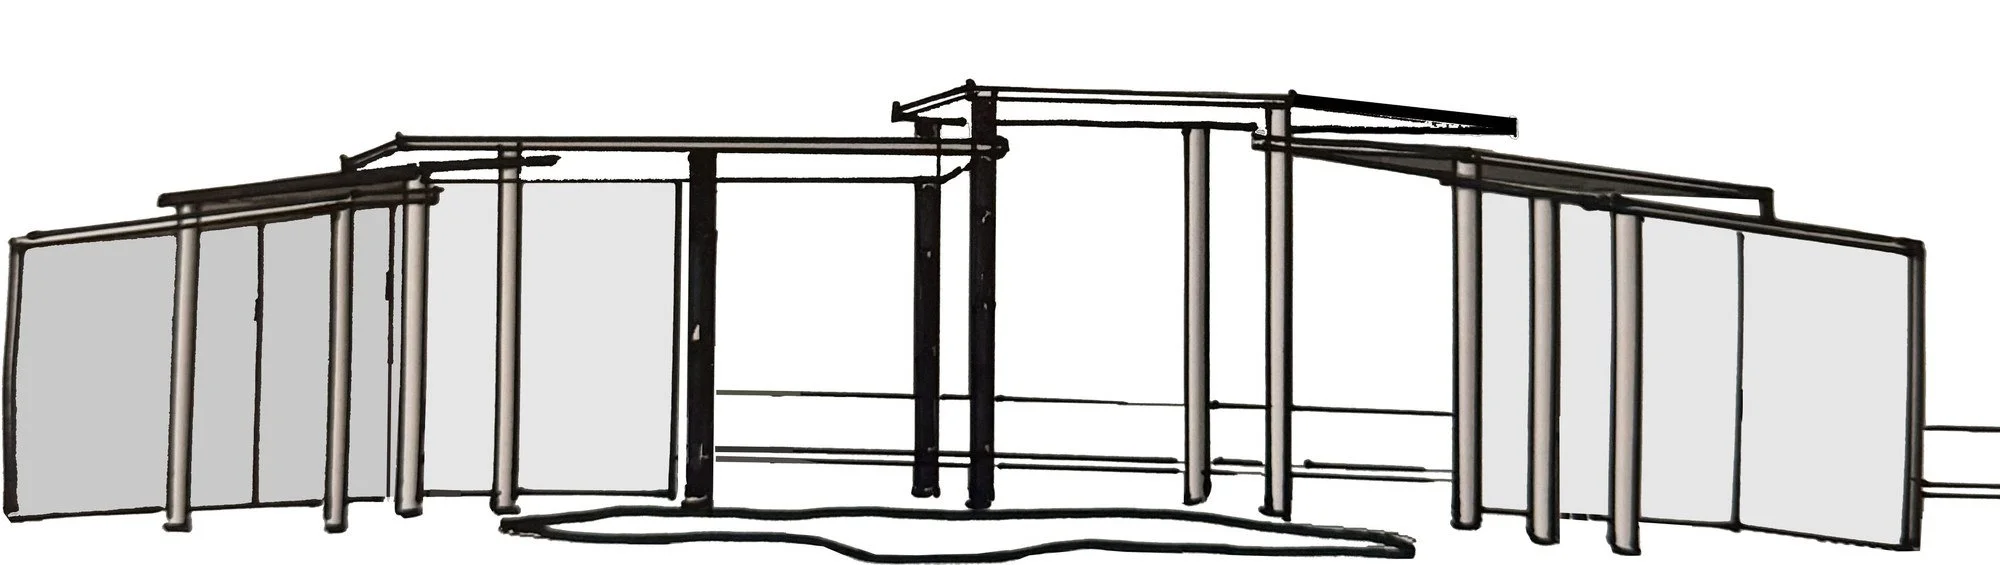
Hand sketch over Vectorworks 3D Model
THE PROMPT
Generate a wide-format, photo-realistic architectural rendering of a warm, welcoming community pavilion in San Jose, California — an urban sanctuary designed to feel like stepping into a serene natural landscape, evoking the calm and beauty of Yosemite Valley. The pavilion is a gathering place where parents and their children come to connect with neighbors and with each other — a peaceful retreat from the stress of daily life where families share quality time surrounded by nature. The design features a series of flat black metal roof planes supported by smooth oval concrete columns and cast-in-place concrete walls, their forms nestled among mature native trees to San Jose, and layered naturalistic planting softening the edges of the architecture. A shallow reflecting pool sits in the foreground. A street and sidewalk are visible beyond the structure. The time of day is dusk — the sky holds the soft warm colors of a fading sunset, still light enough to read the architecture clearly, while warm lighting from under the roof planes washes the concrete surfaces. The scene includes groupings of people: parents with children playing next to them as drawn in the sketch. The image is captured at eye level for a human, inviting perspective. The final image should mimic professional architectural photography shot with a 35mm lens, featuring warm cinematic lighting, gentle reflections in the water, subtle volumetric mist, soft ambient dusk glow.
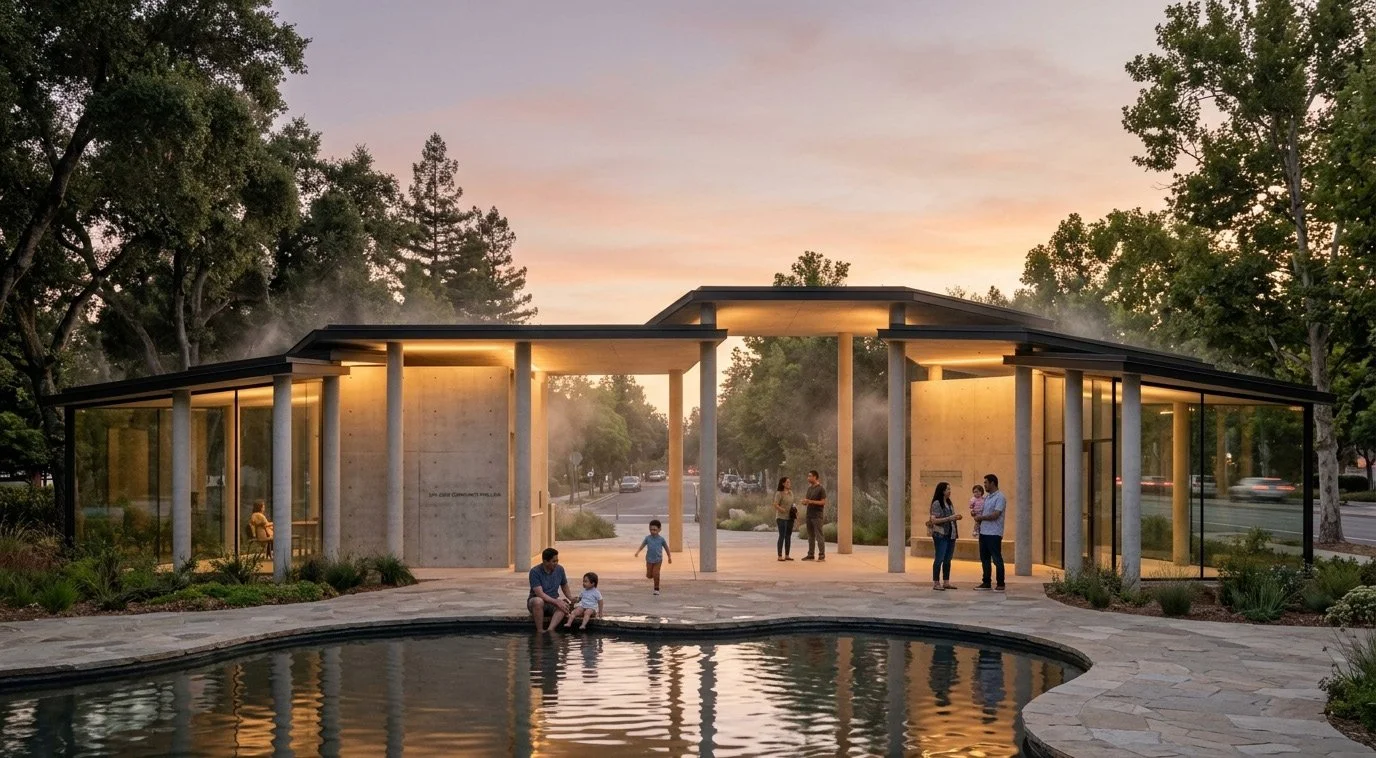
ITERATION 01
POSITIVES
The reflecting pool and background capture the mood that I intended.
NEGATIVES
Glazing and enclosures are at the wings. The mist reads like staging for a set rather than a real place. The concrete and metal roofs feels more like a formal space, such as museum, rather than a park structure. The scale of the structure is too small in comparison with the sketch.
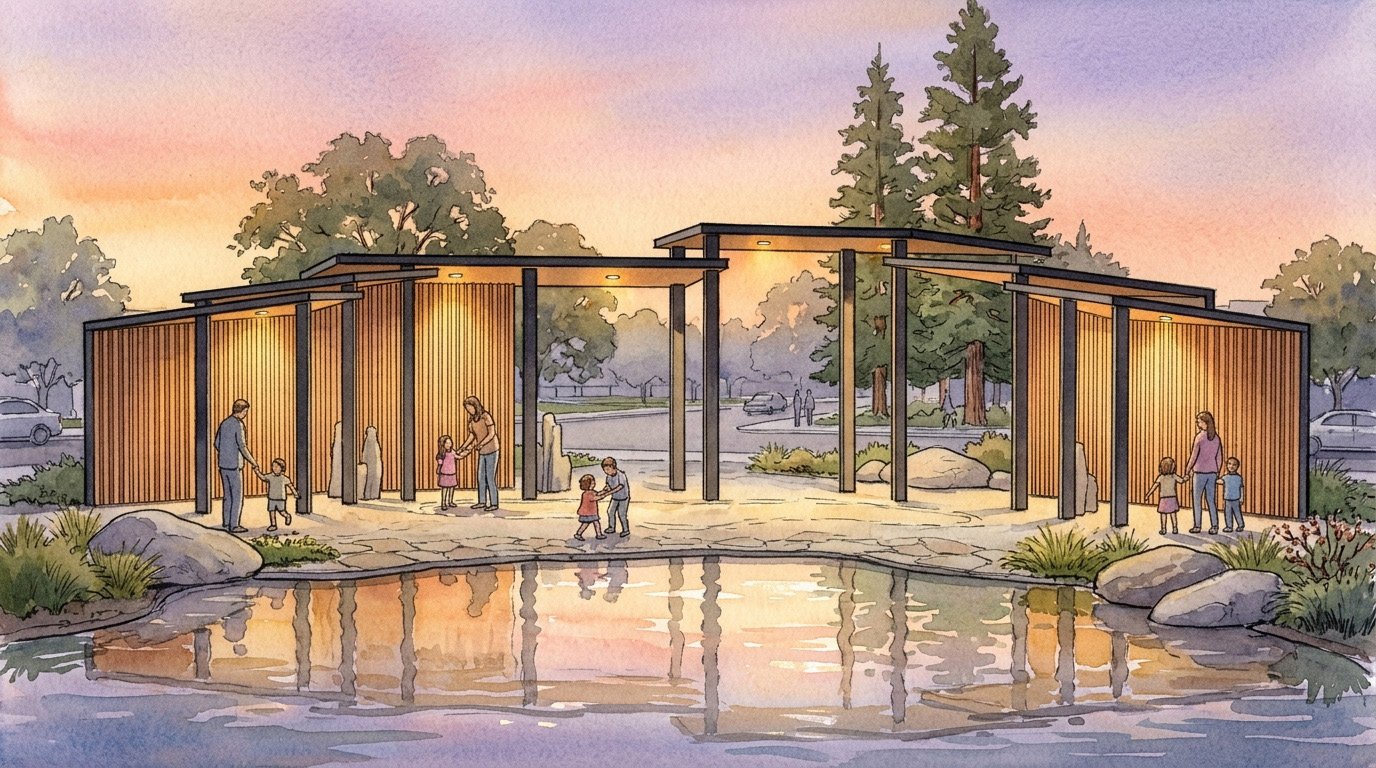
ITERATION 04
I departed from the concrete with a new prompt specifying wooden slatted walls to bring warmth.
I also changed the medium to a hand-painted architectural watercolor to bring imagination, informality, and a childlike feeling of wonder.
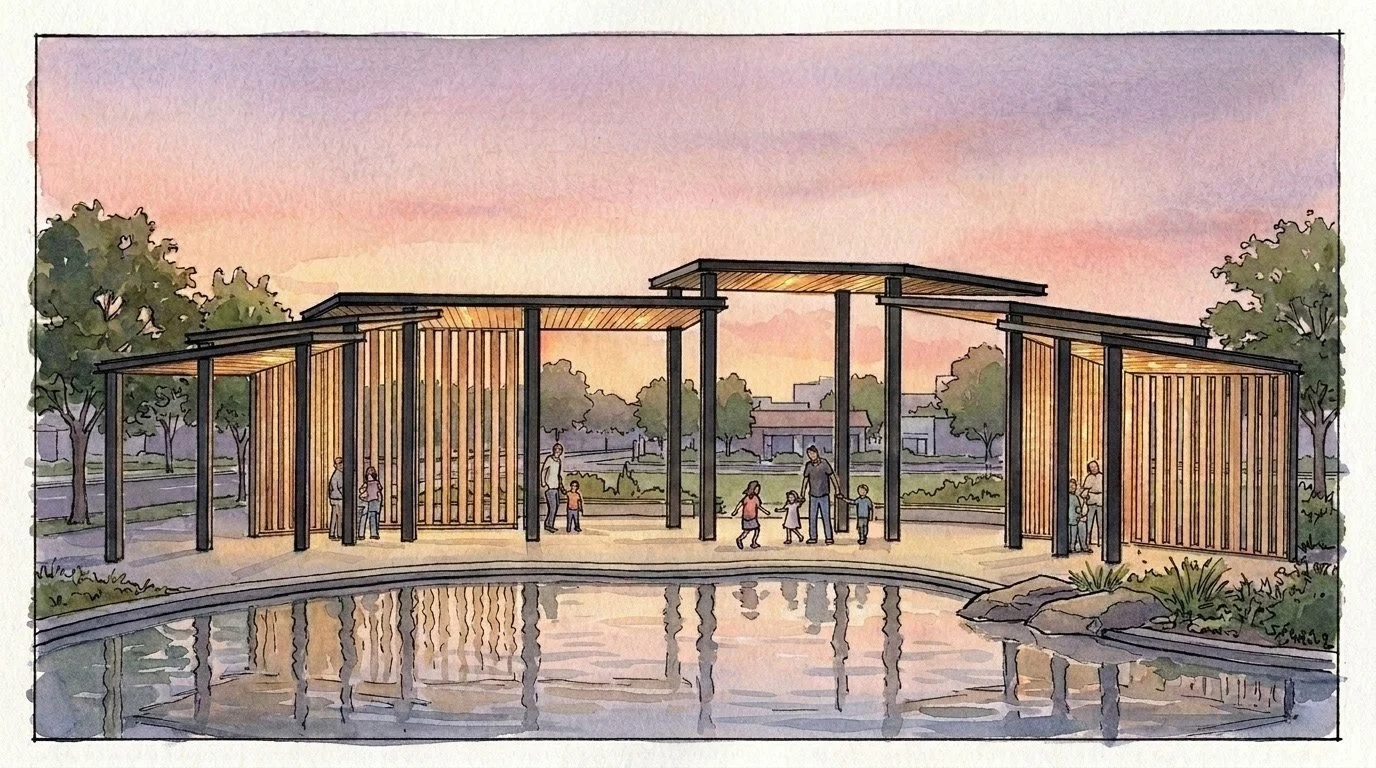
ITERATION 08
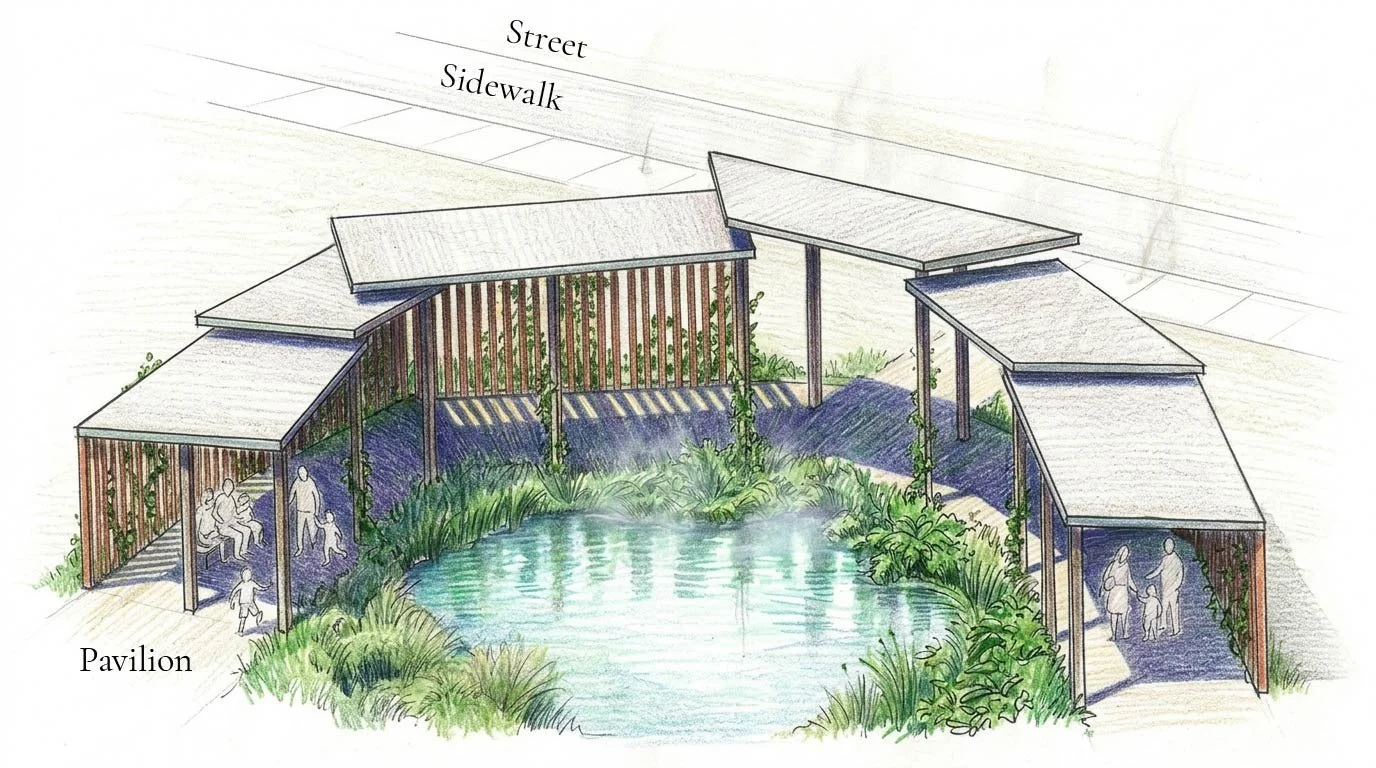
The revised prompt requested openings in the slatted walls. The walls would still provide cover, allowing families to feel sheltered and immersed in their surroundings. Gaps in the wall would provide visibility and bring a feeling of safety within an urban context.
I used the annotation tool to remove the can lights, leaving their glow, and to add columns so structure felt realistic.
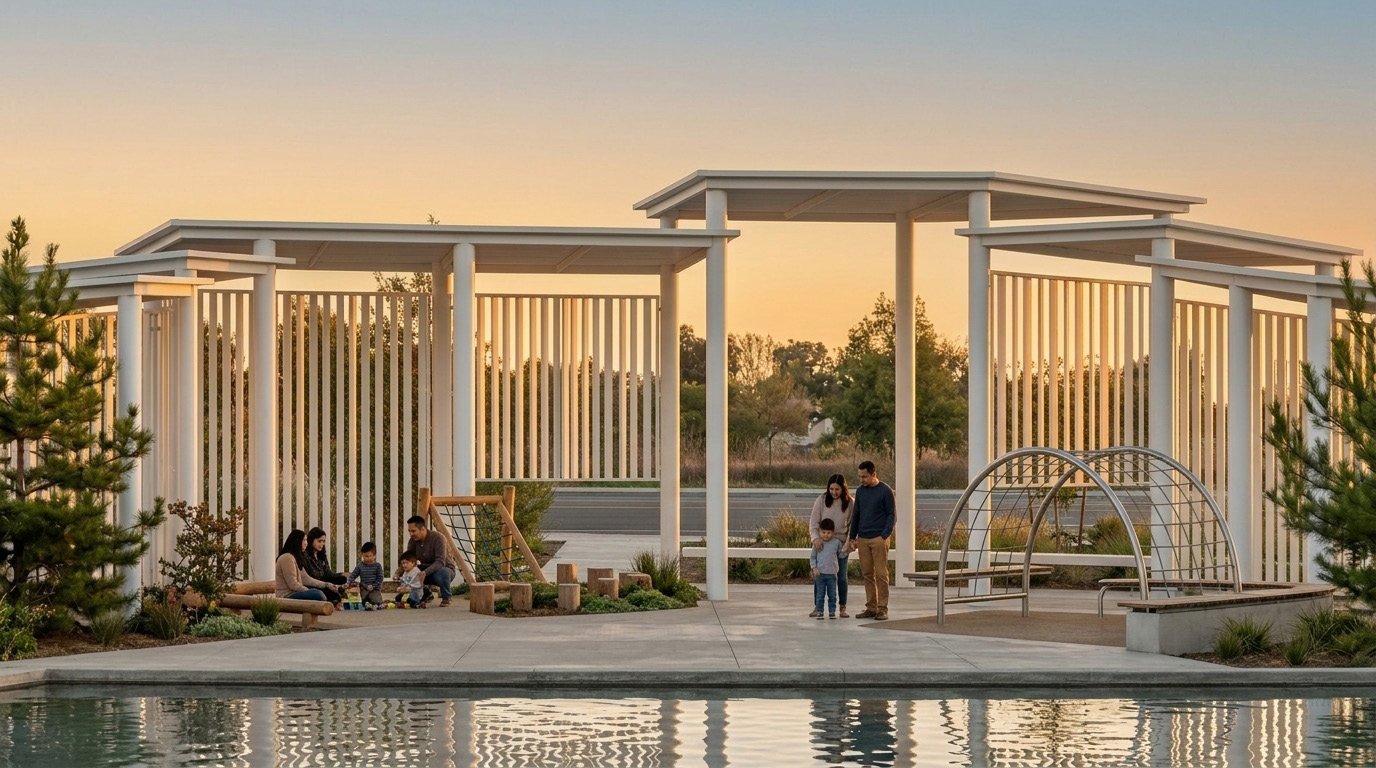
ITERATION 10
In this prompt, I shifted the materiality to metal for durability and requested play structures to occupy the children.
NEGATIVES
The play structures resemble residential or indoor equipment rather than park playground equipment, are not nestled beneath the canopy, and are too prominent within the image. The canopies should be the dominant element. The 16:9 format doesn’t serve this sketch.
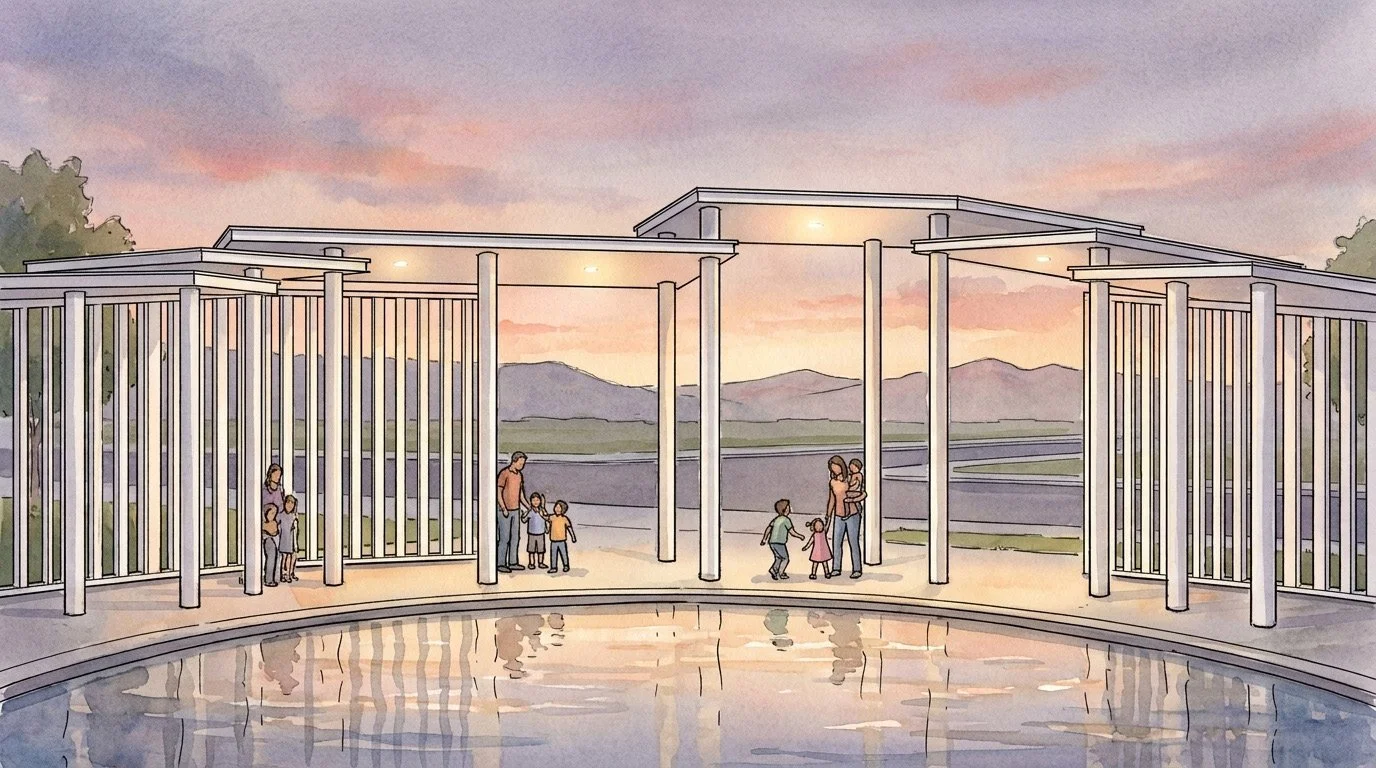
ITERATION 11
I changed the rendering style to watercolor.
NEGATIVES
The white metal still appears too monumental or institutional, like something you would see in Washington DC. The regular oval appearance of the pool reads formal.
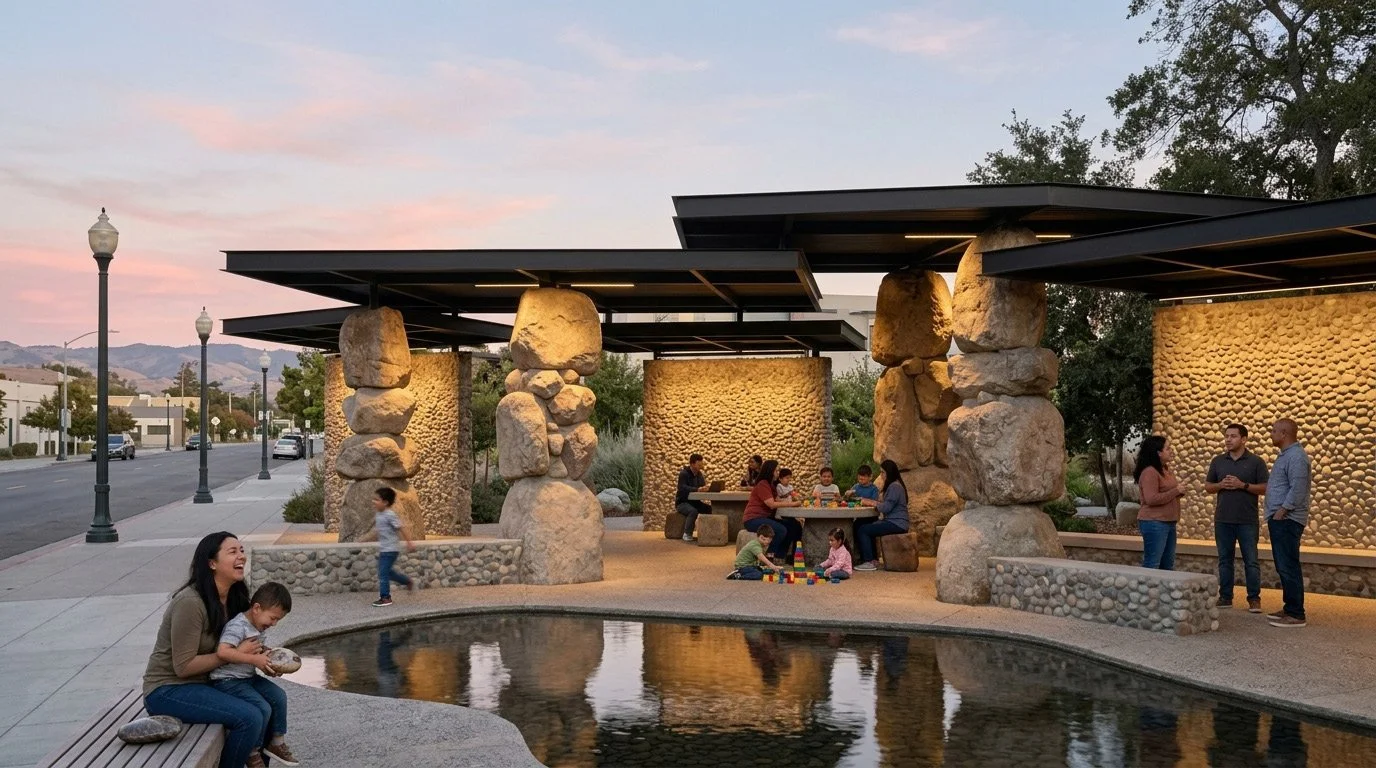
ITERATION 13
Departing from conventional materiality, I prompting for columns that resemble the standing stones at Stonehenge and concrete walls with a large cobble aggregate. This design isn’t easily buildable or feasible but was a fun experiment with AI. Its unique appearance could help you disconnect from everyday life. Masonry recalls the cliffs in Yosemite.
POSITIVES
This image feels surreal and creative. I love the textured walls and their connection to the metal roof.
NEGATIVES
Smaller stone were stacked to create the columns rather than showing a single stone. Also, the photorealistic style didn’t match the playful content.
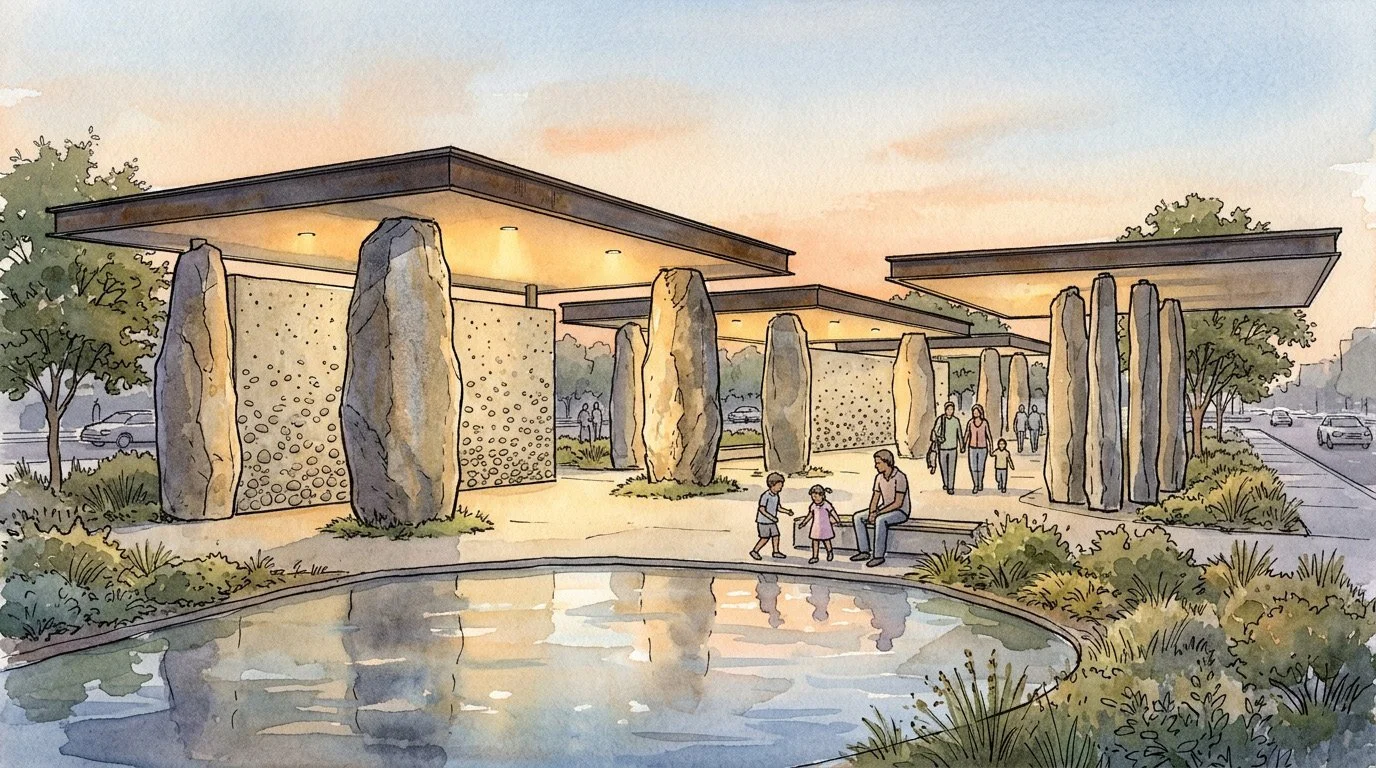
ITERATION 16
In this prompting iteration, I neglected to upload my sketch and the model proposed its own design. The flanking canopies could engage an existing bustling thoroughfare and draw visitors through the space to the reflecting pool. This layout feels more visually engaging. AI functions less as a rendering tool but more as a colleague offering a design alternative, not only informing materiality and atmosphere, but the design itself.
POSITIVES
Returning to the watercolor rendering style better matched the design.
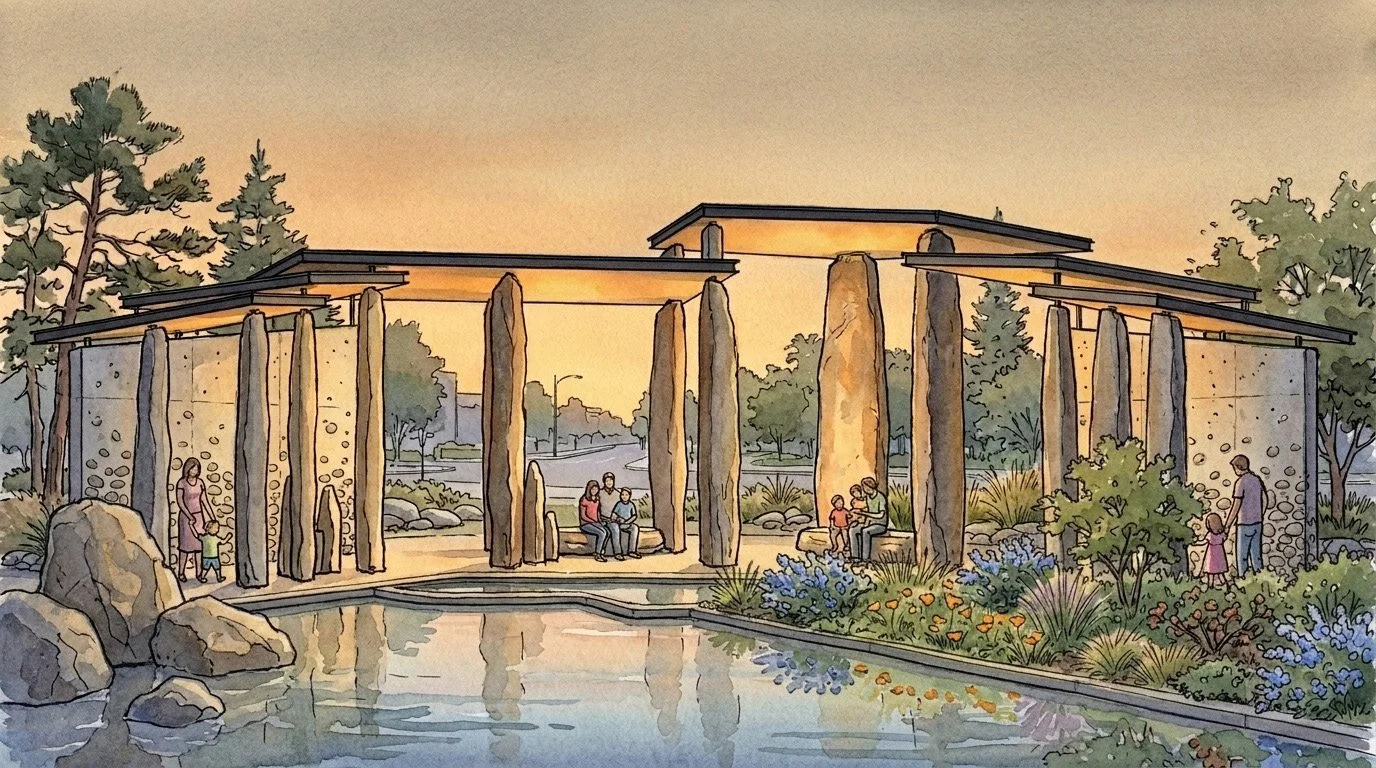
ITERATION 18
I added greenery and boulders with the annotate feature to soften the edges of the reflecting pool. The improbably large stones transport the viewer to an older, simpler time.
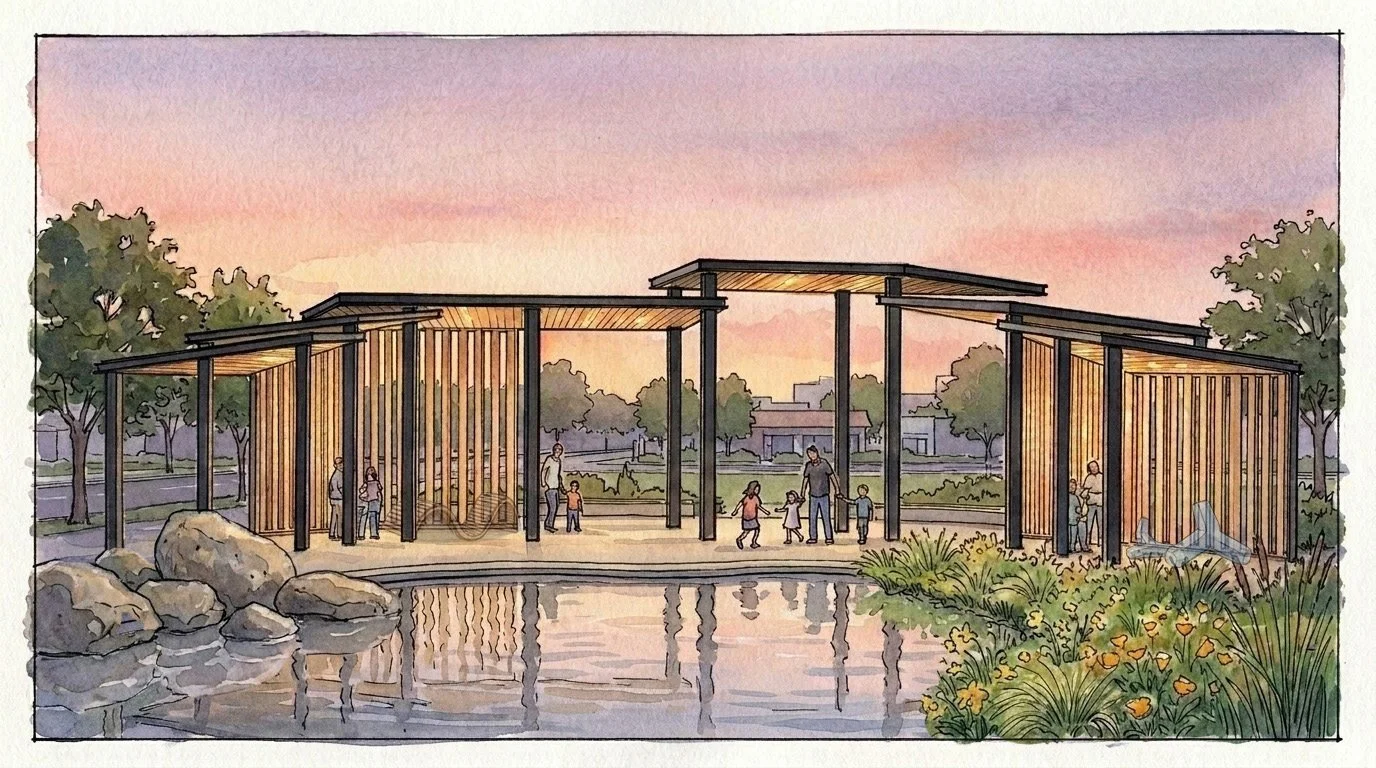
REVISED ITERATION 08: FINAL DESIGN
NARRATION
This pavilion in San Jose evokes transcendent and calm feelings of visiting Yosemite. Located conveniently, parents and children can easily visit the pavilion to connect with one another and with other families in the community.
The canopies provide shade, the walls and columns provide enclosure and maintain visibility to the street. Beneath the canopy, children play and the community gathers for events such as a farmers’ market. A reflecting pool at the center offers cooling, a sense of serenity, and a respite from everyday life.
ASSIGNMENT 2: Thought Process: Diagram, Elevation, & Materiality
This assignment was to communicate the design with diagrams, elevations, and a mood board.
TOOLS
RunDiffusion, Photoshop, Claude
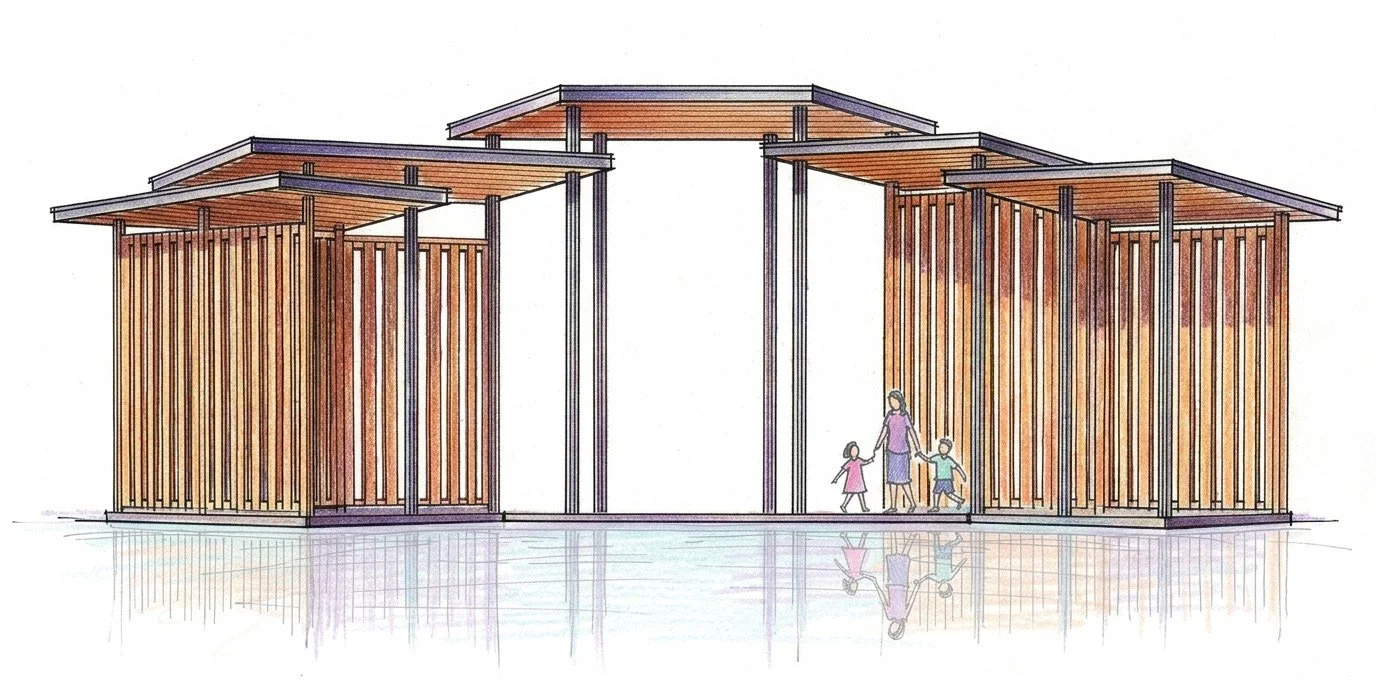
I uploaded a screenshot of the front facade from my Vectorworks model and asked Nano Banana 2 to draw the elevation with confident freehand strokes rather than ruled precision using vivid, saturated colored pencil, layered and built up with visible directional strokes and cross-hatching, varying the hues on every surface. In Photoshop, I faded the reflecting pool below the pavilion and softened the figures.
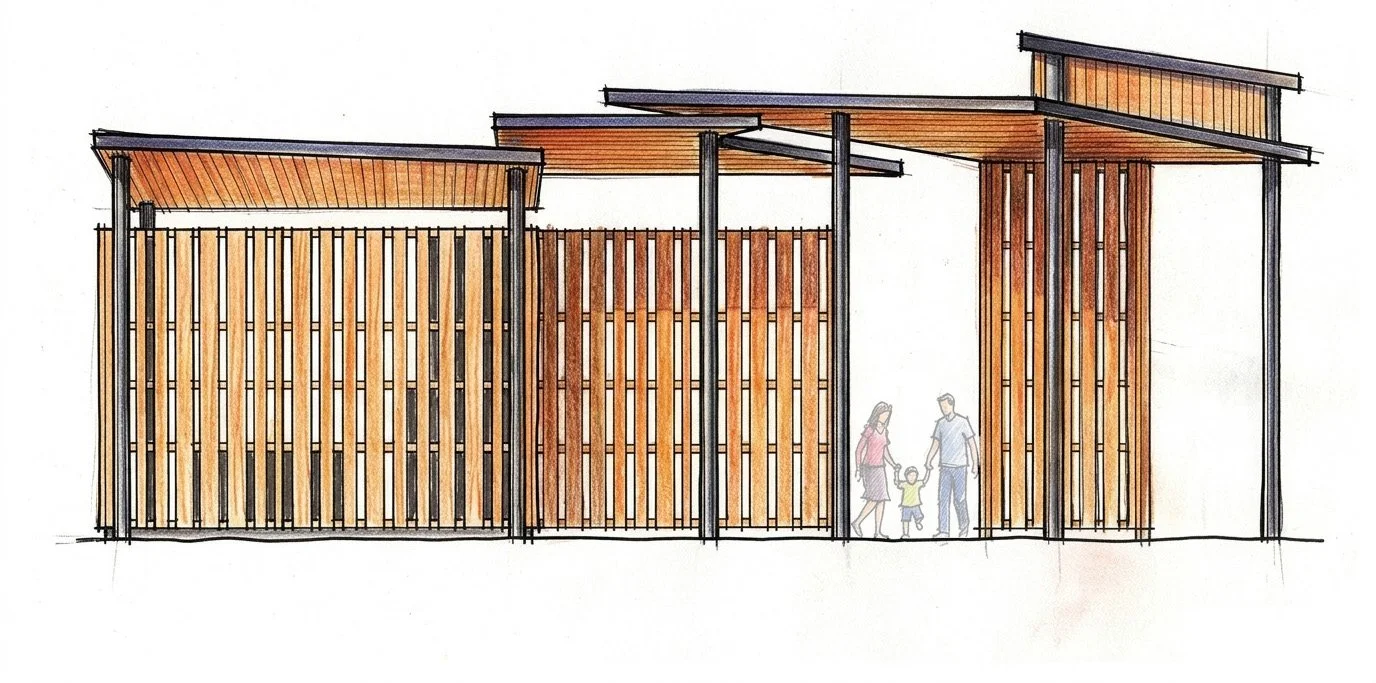
A side view from the model produced a badly distorted elevation, so I generated a section instead, which was more successful. I again faded the figures so they read as scale reference rather than subject.
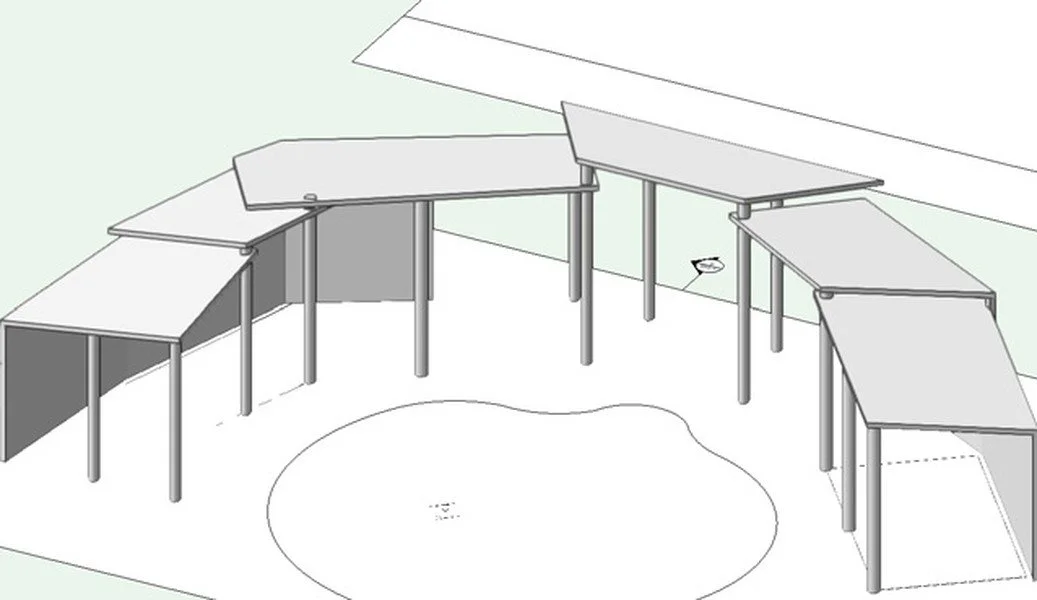
A. Screenshot of Vectorworks model
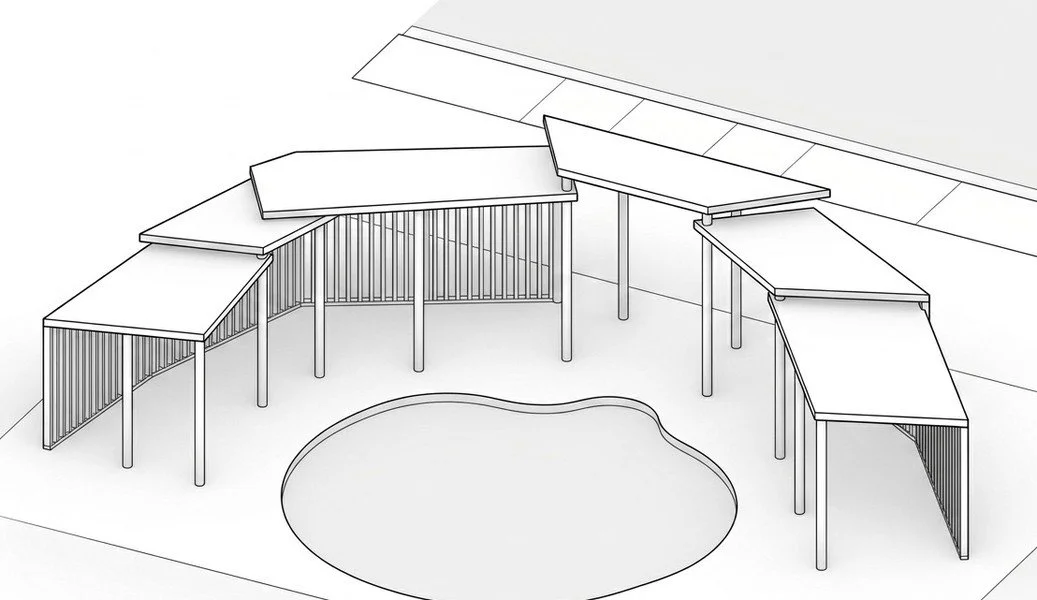
B. NanoBanana2 prompt for massing model
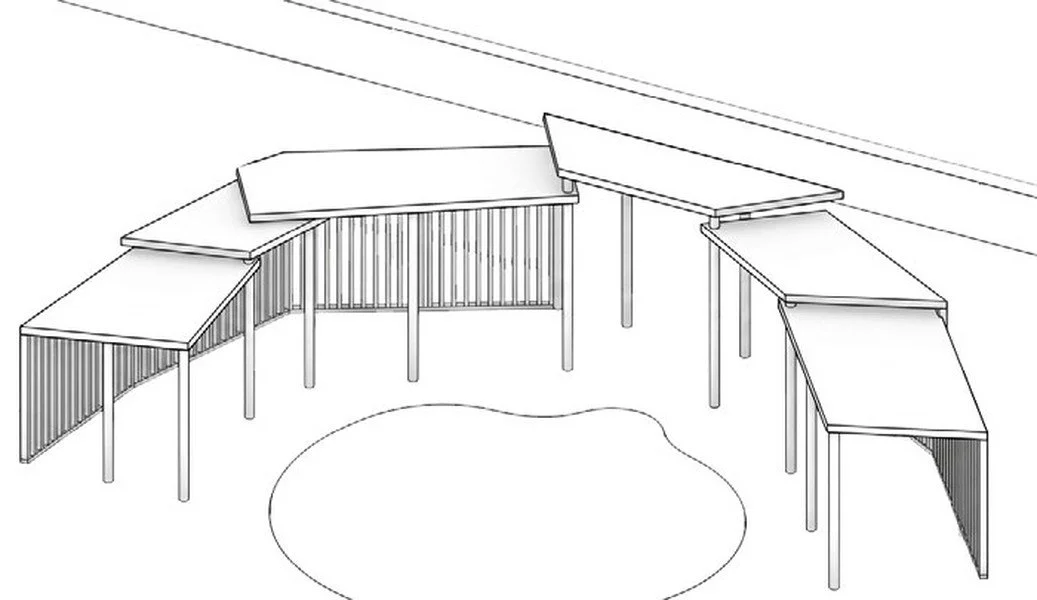
C. Edits in Photoshop for simplicity
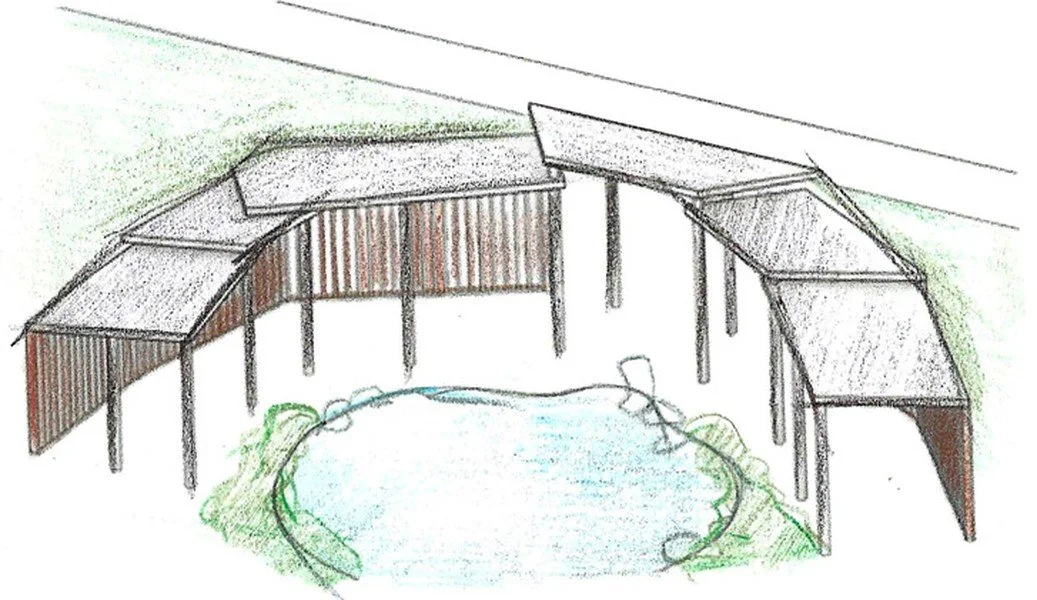
D. Sketch with colored pencils over the image
I used a screenshot of my Vectorworks model (A) to generate a black-and-white axonometric massing drawing (B). I simplified that image in Photoshop (C) and sketched over it in colored pencil to create the diagram (D). I then ran the sketch back through Run Diffusion as a base image, asking it to be enhanced into a finished colored pencil drawing while keeping the same geometry and design.
The diagram illustrates the design idea of creating a cool, shaded oasis carved out of a hot, hard city. The pavilion is lush and planted, while the adjacent sidewalk and street stay flat, hard, empty, and lifeless.
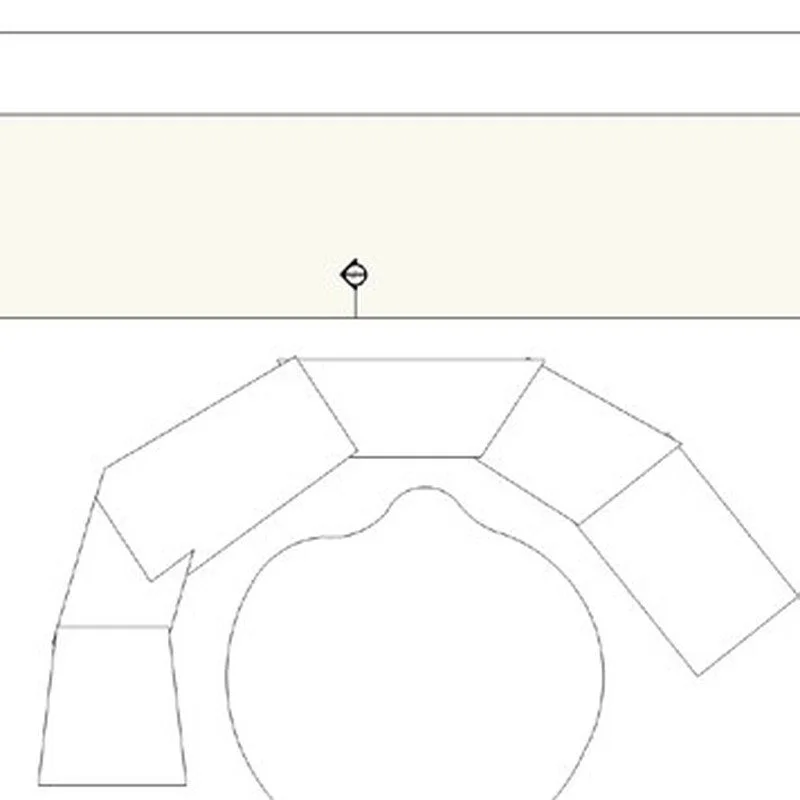
A. Screenshot from Vectorworks model
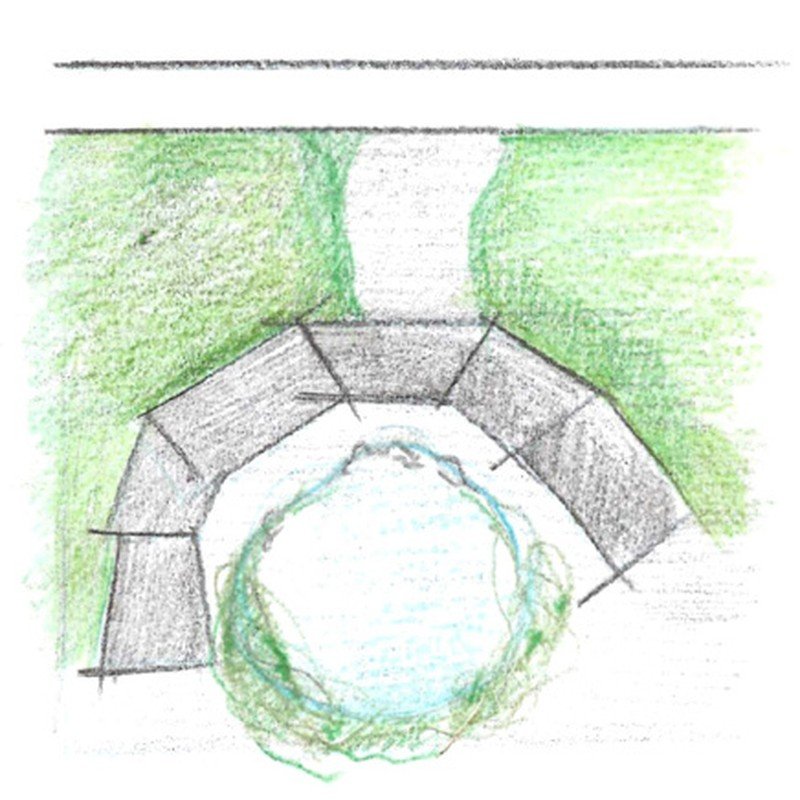
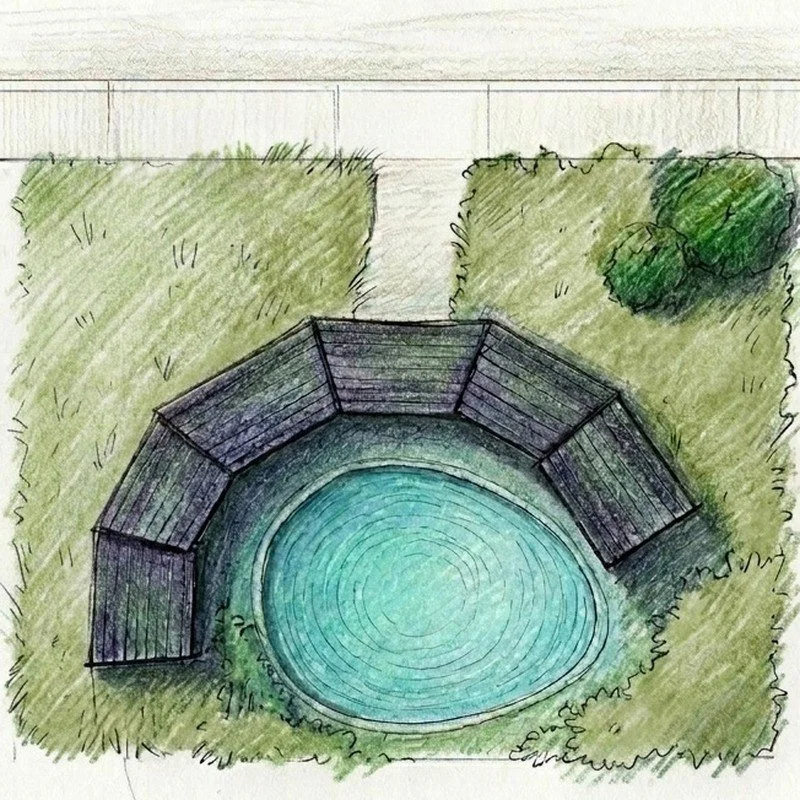
B. Sketch with colored pencils over the image
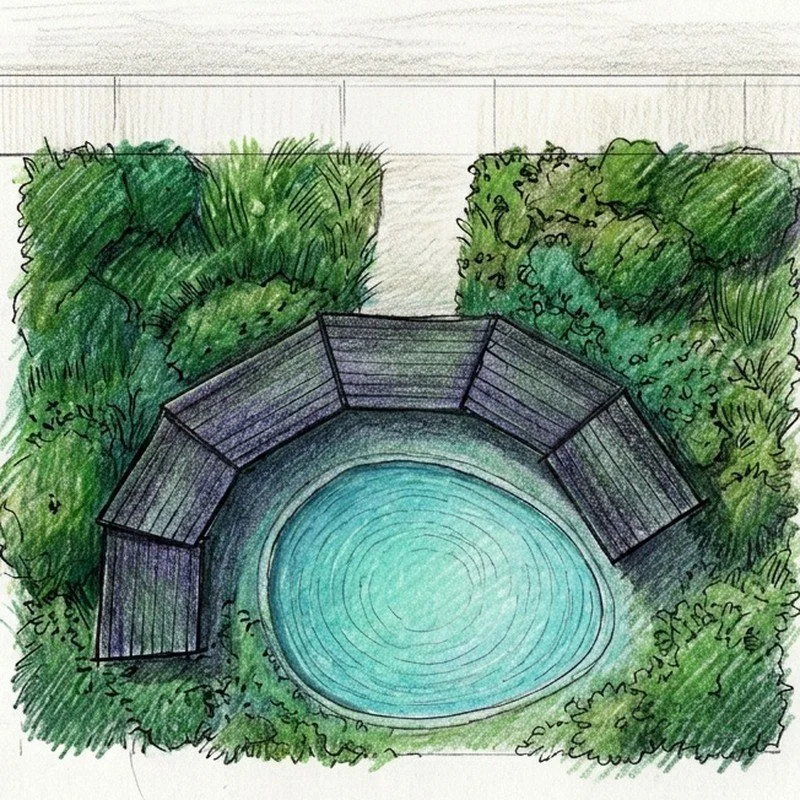
C. Images from RunDiffusion stitched together
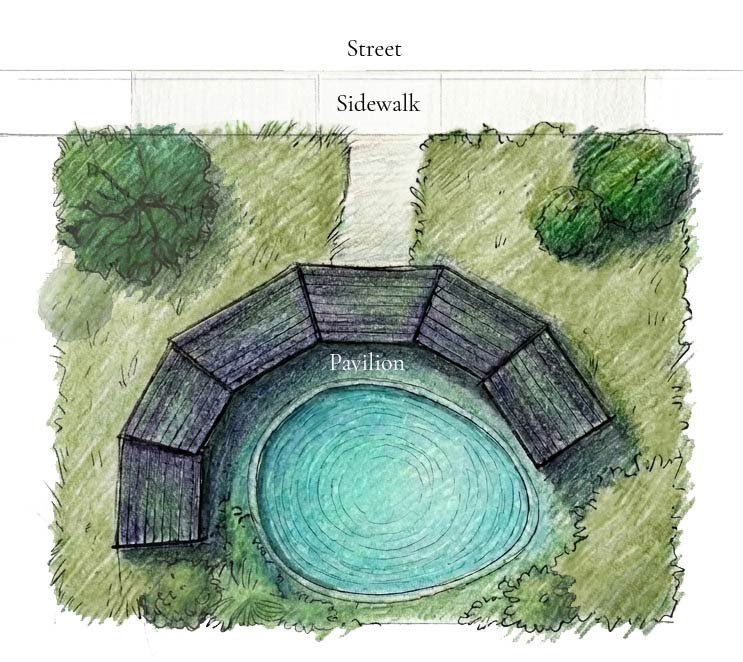
I used a screenshot of the plan view from my Vectorworks model (A) and sketched over it in colored pencil (B). I then ran that sketch through Run Diffusion as a base image, using a prompt very similar to the previous diagram. Run Diffusion returned several versions with different levels and types of landscaping (C), which I stitched together and refined in Photoshop for the final plan diagram.
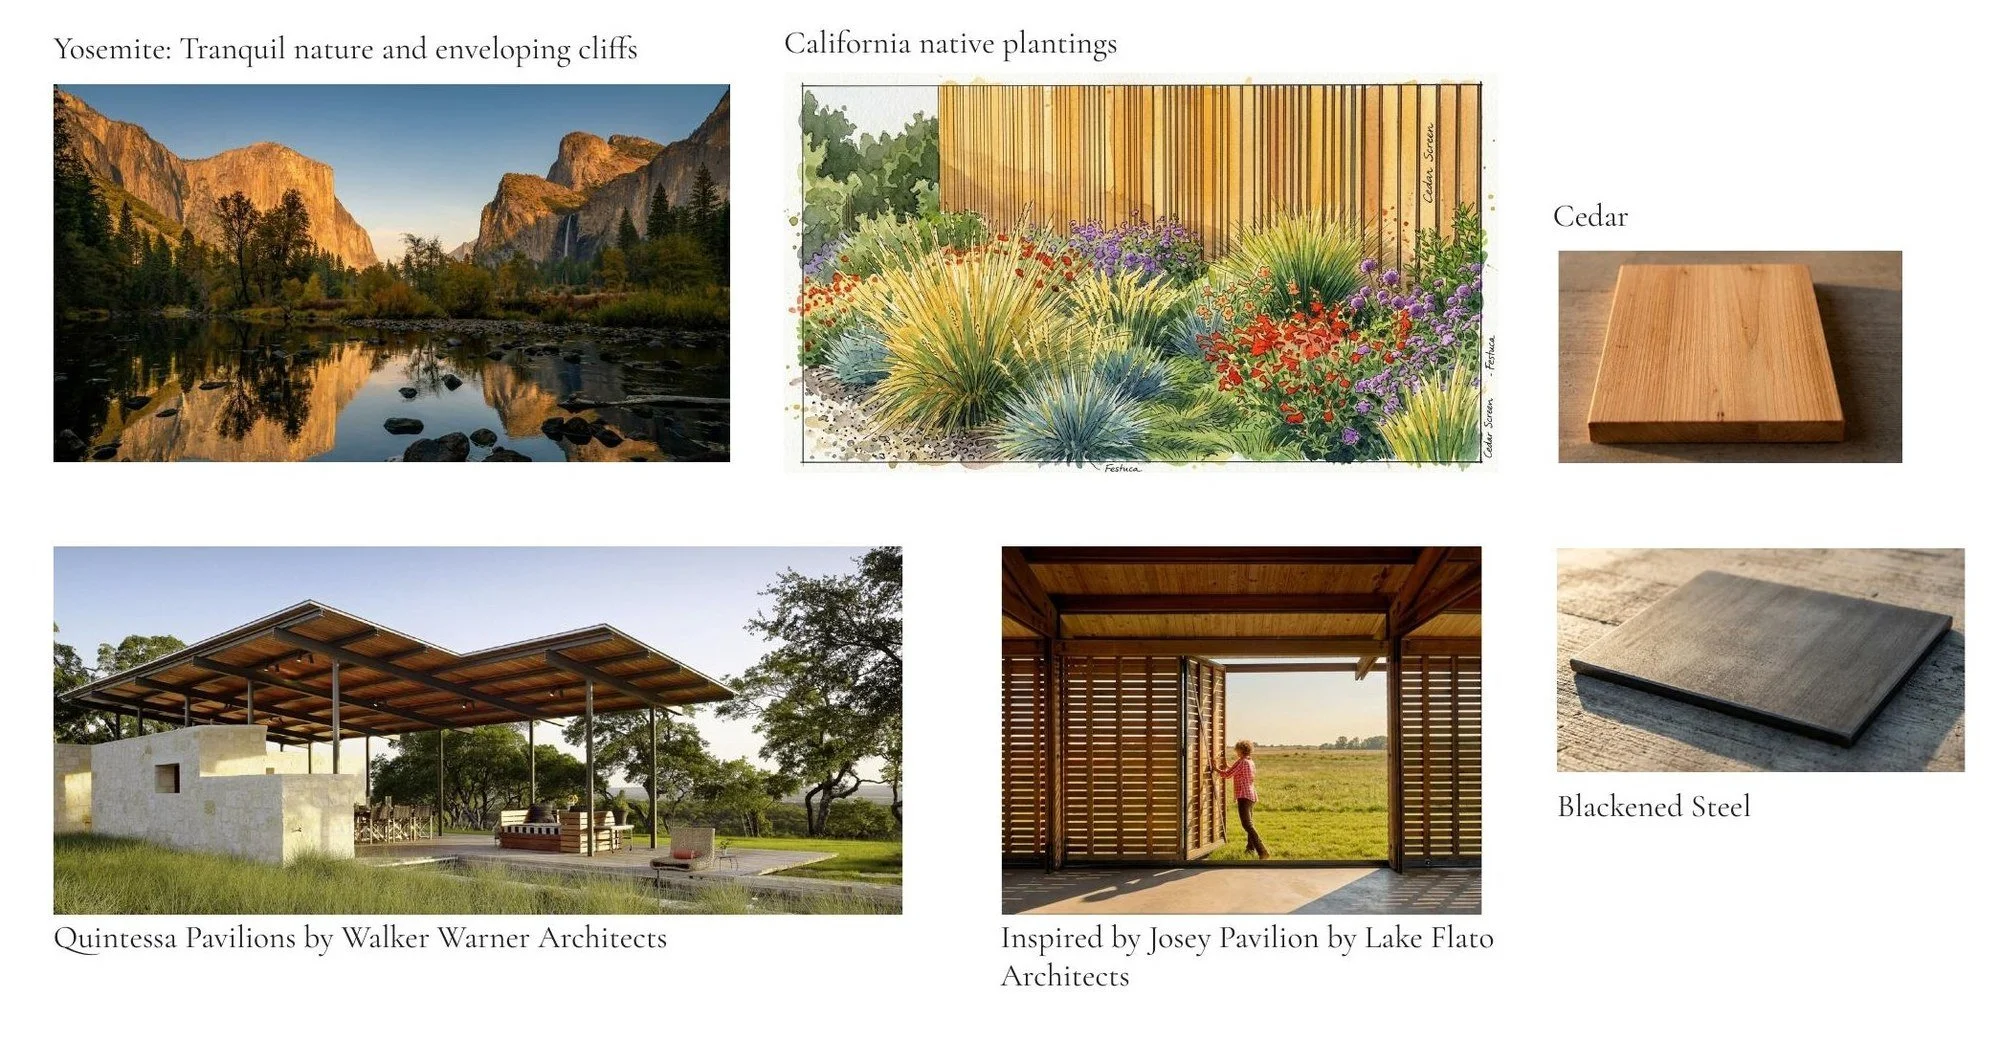
The California native plantings, cedar, and blackened steel images were generated with Nano Banana 2. The remaining reference photographs were edited in Nano Banana 2.
ASSIGNMENT 3A: Custom AI Tool Concept
Identify a bottleneck in practice and conceptualize an AI-driven solution. Defining the problem, data inputs, expected outputs, and integration into the design process leads to the development of a tool or app.
TOOLS
Claude
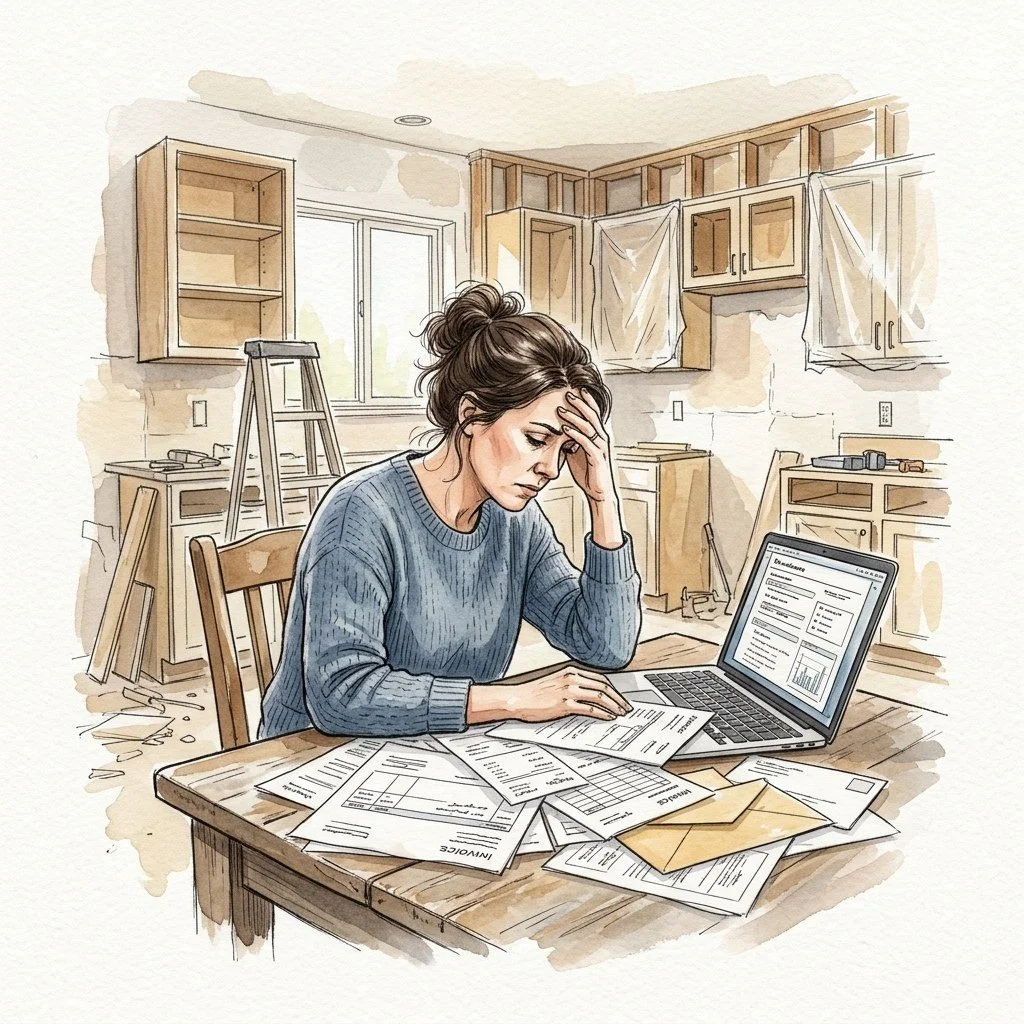
During construction, a homeowner’s costs arrive from many directions at once: the general contractor’s draws, subcontractors the homeowner contracted directly, and materials and fixtures the homeowner purchased on their own. It’s difficult to see the full picture. The homeowner is spending more money, faster, than they are used to spending, and construction is stressful and time-consuming enough that even the most experienced don’t have the bandwidth to track it properly. So when a change order or an opportunity comes up mid-construction, when everyone is demanding an answer quickly, the client can’t answer the basic question: what have I spent, what do I still owe, and where does that leave my budget?
The difficult tracking work falls to the architect. Purchase orders go through many drafts before ordering making the final version hard to locate. It is tedious, low-value work that consumes hours the architect could spend on creative work. This all occurs during a phase where clients are fatigued by spending, cost conscious, and are tempted to cut the Architect out. It’s hard for the client to understand the important work and required time spent on things like shop drawing review. However, CA is very important to ensure the design intent is met and avoids even costly errors in the field. It makes construction much less stressful for the client, leading to a better customer experience. Plus it benefits the Architect to stay involved by lowering risk.
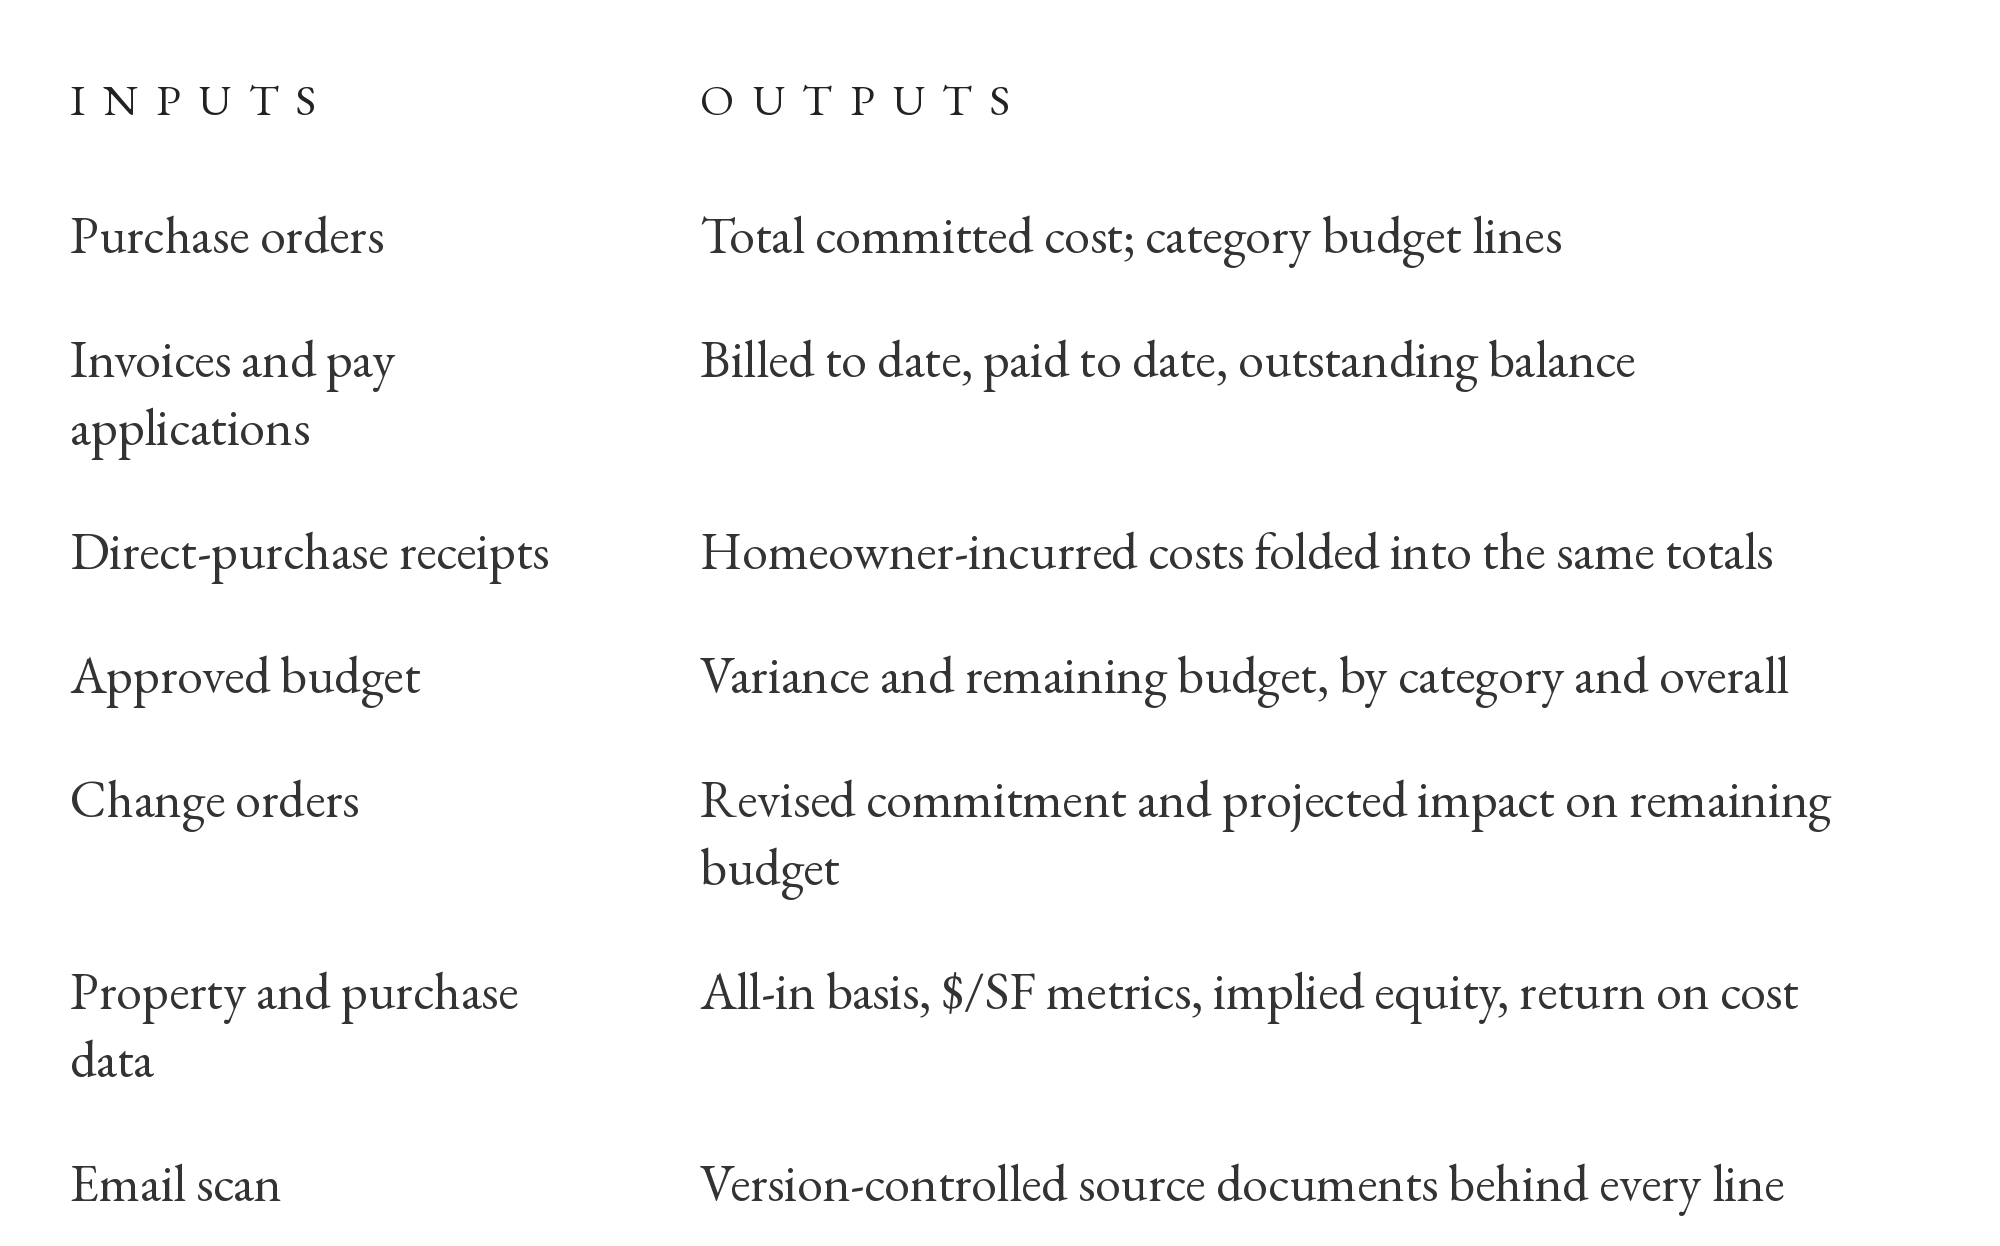
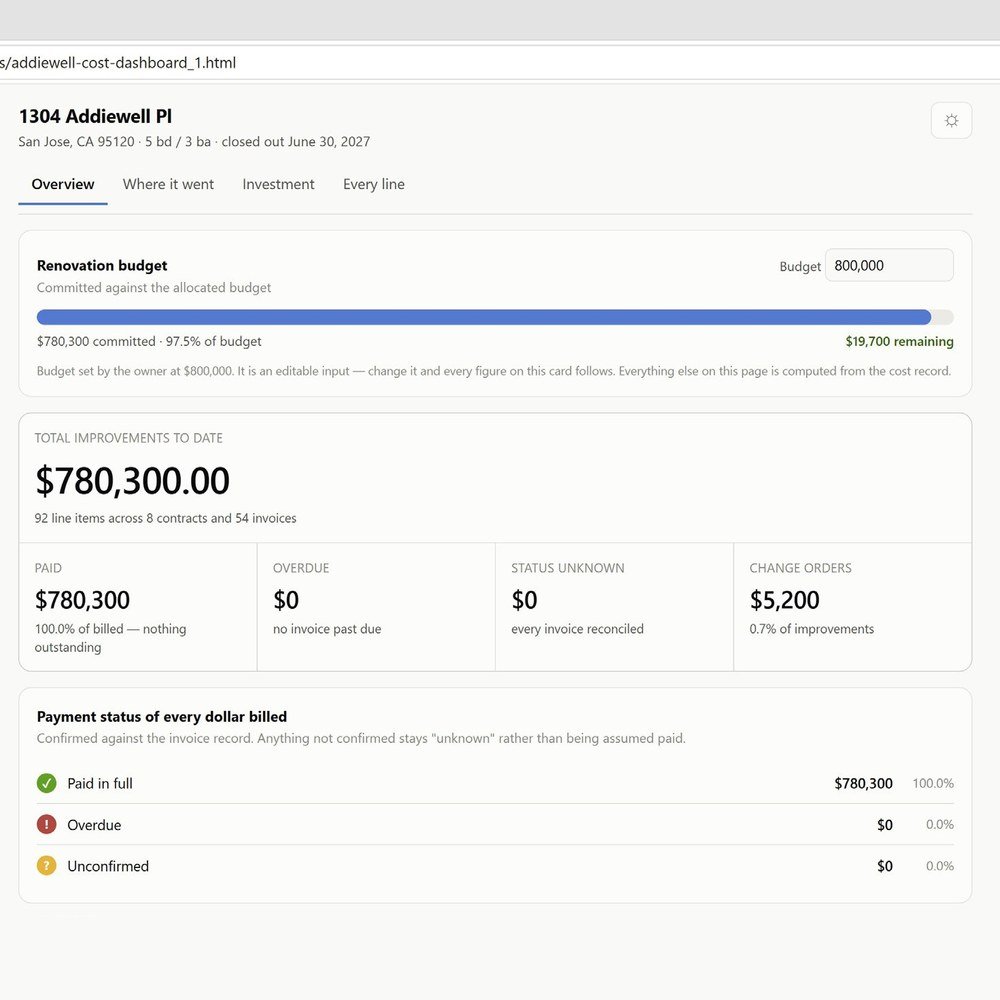
I created this Dashboard in Claude which opens with html.
It’s a fictional project for a home in San Jose which has undergone a renovation, including major upgrades like new windows, roofing, and solar panels. Past projects’ pricing data was input into a spreadsheet that feeds the dashboard.
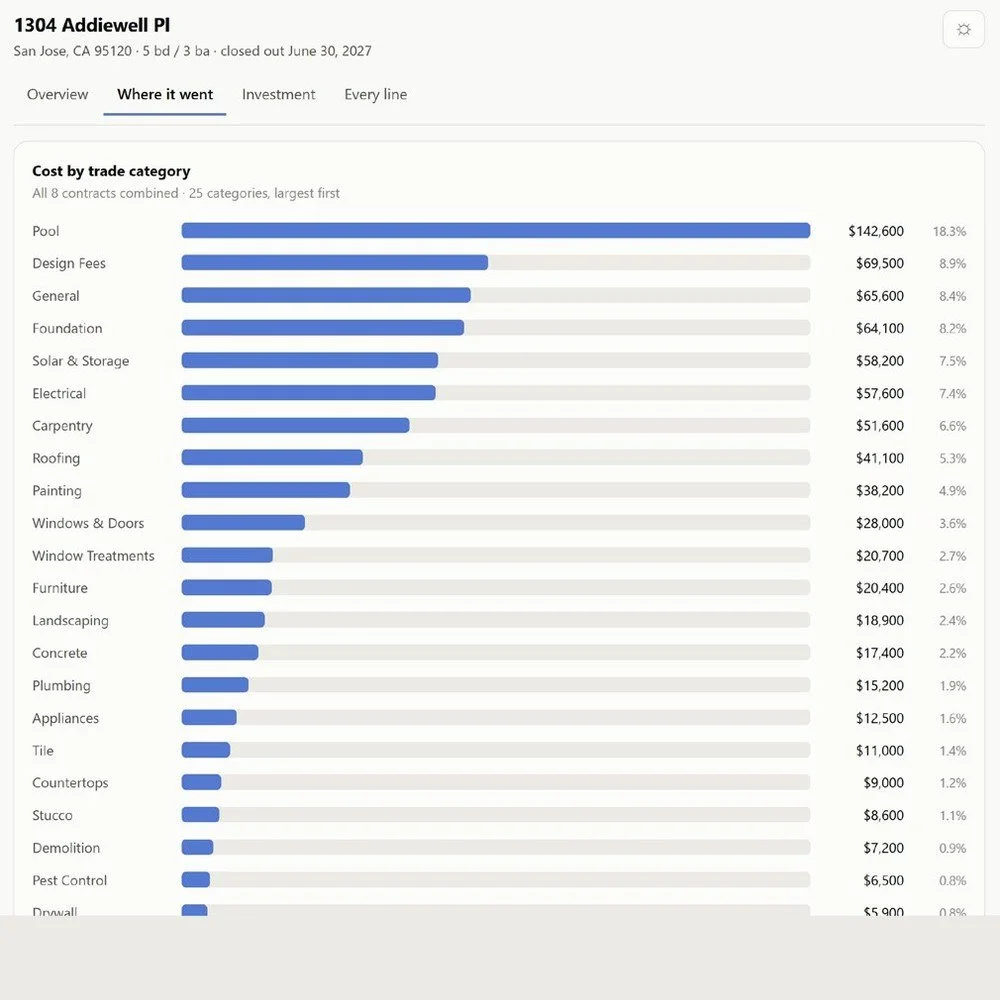
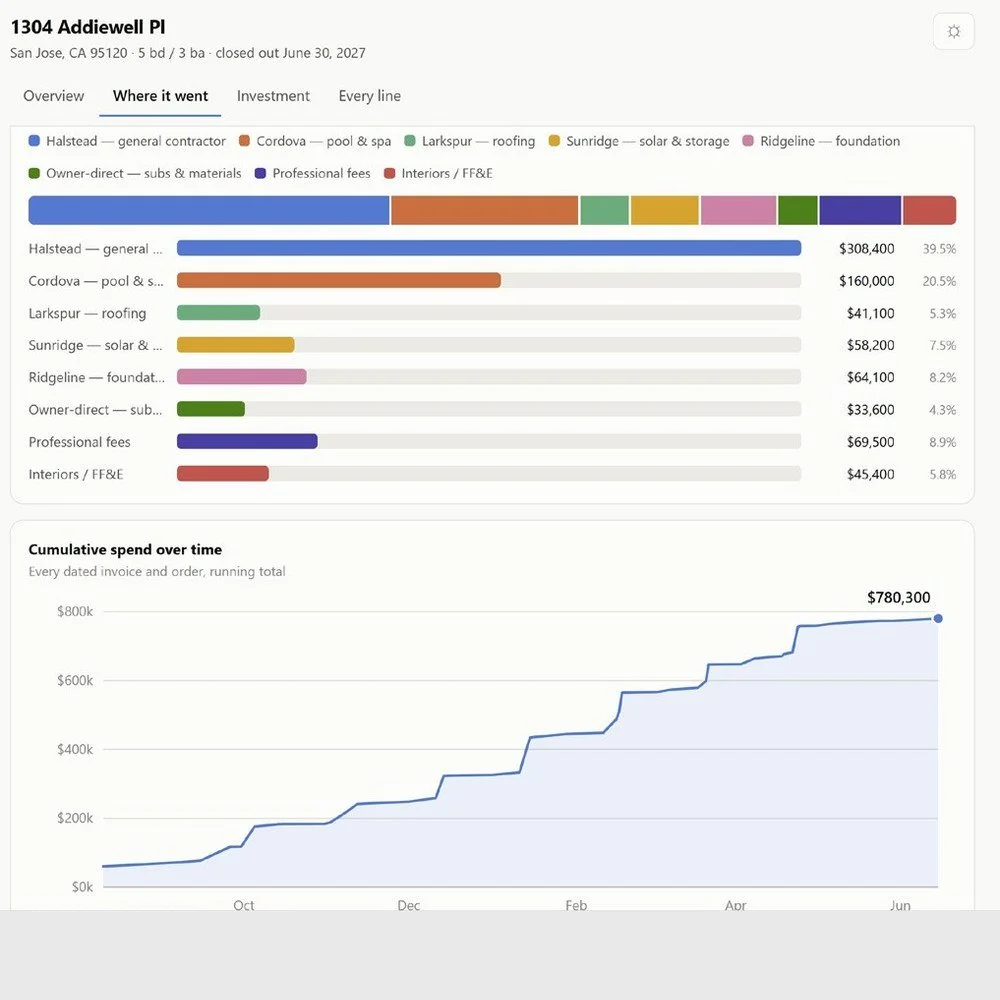
The homeowner can see the trades broken down, seeing for example the pool is the largest investment. It’s also broken down by contract and how it’s spent over time.
The homeowner can consider the cost of the project in terms of their overall investment in their home, seeing the cost of construction next to numbers such as their purchase price, annual tax liability, square footage, and cost per square foot.
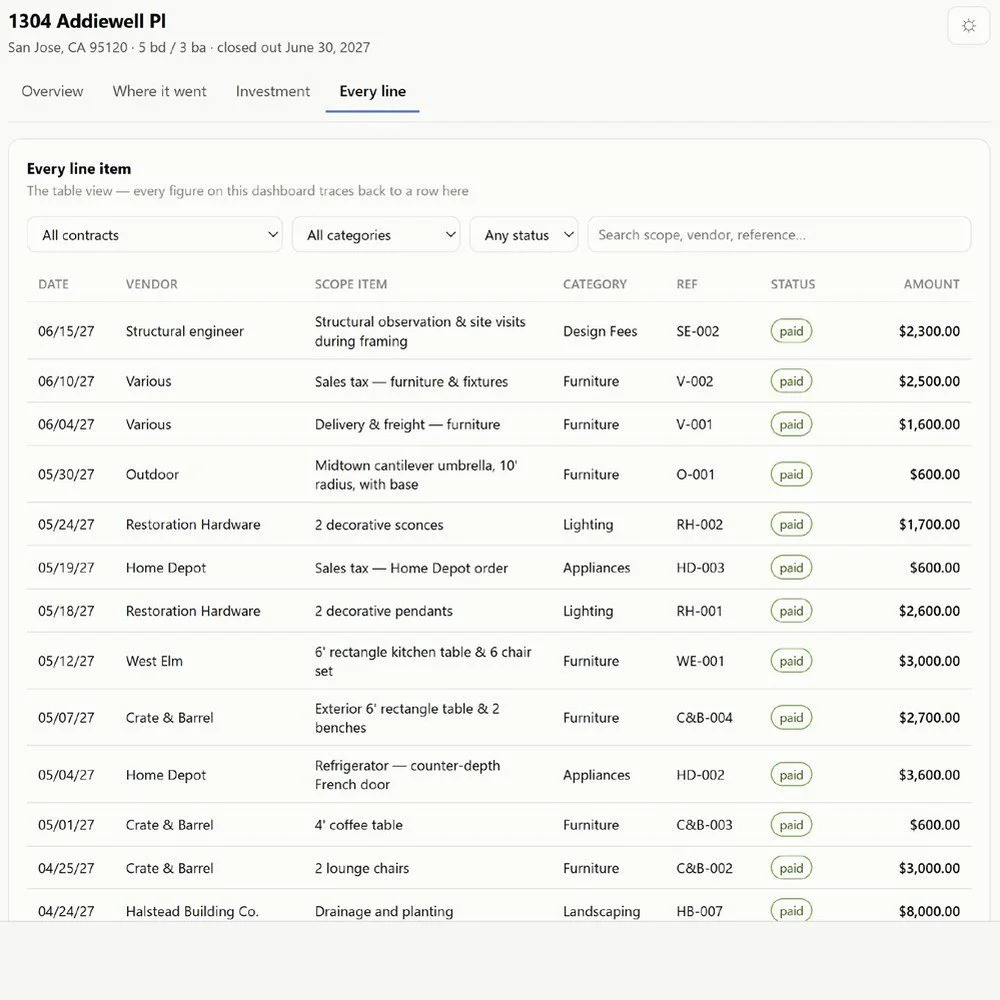
Each individual line item is listed so the homeowner can drill into the details too.
ASSIGNMENT 4: Contextualizing the Render - Generative Fill
An exercise in bringing a render to life with Adobe Firefly's Generative Fill by populating the scene with people with diverse backgrounds and abilities and transform the context from a lively environment.
TOOLS
Adobe Firefly
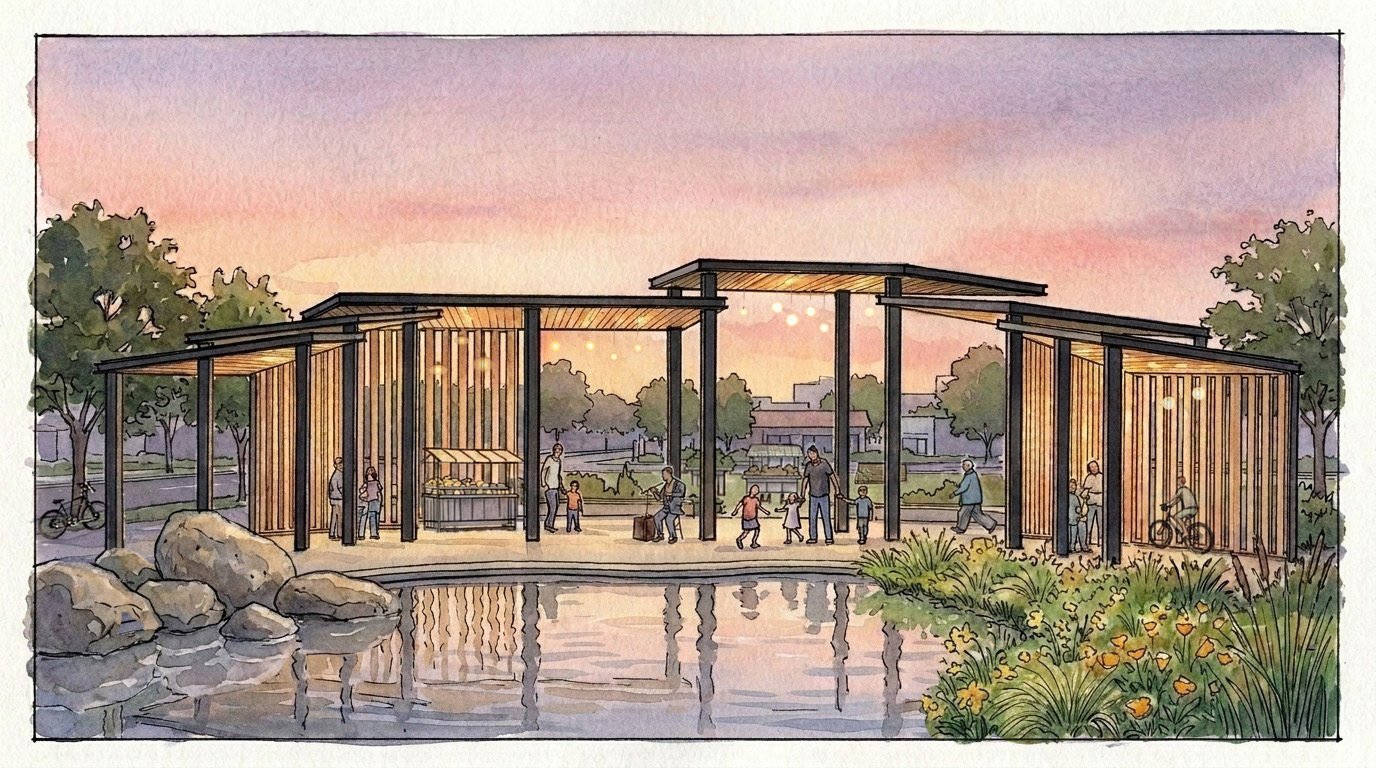
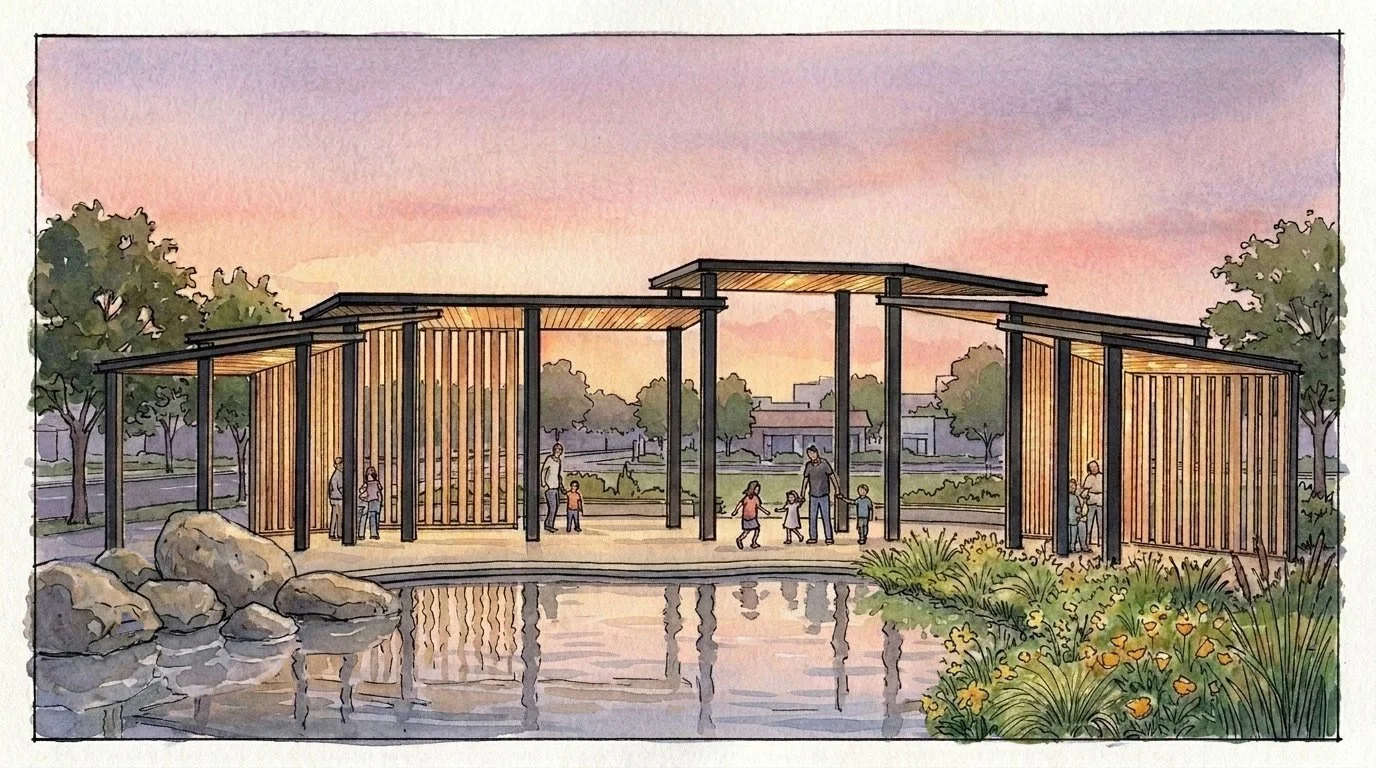
Using Generative Fill, I populated the pavilion with people of varying ages and activities, such as cyclists passing through. Farmers’ market stands and a musician enliven the space and pendant lighting adds warmth and mood. The goal was to transform the render into a lively community destination.
ASSIGNMENT 5: Automating the Blueprint - From Model to Issuance
Exploration of AI-assisted documentation in Revit with SketchPro AI, involving automated sheet setup, dimensioning and tagging and live schedules linked to model data.
TOOLS
Revit, SketchProAI
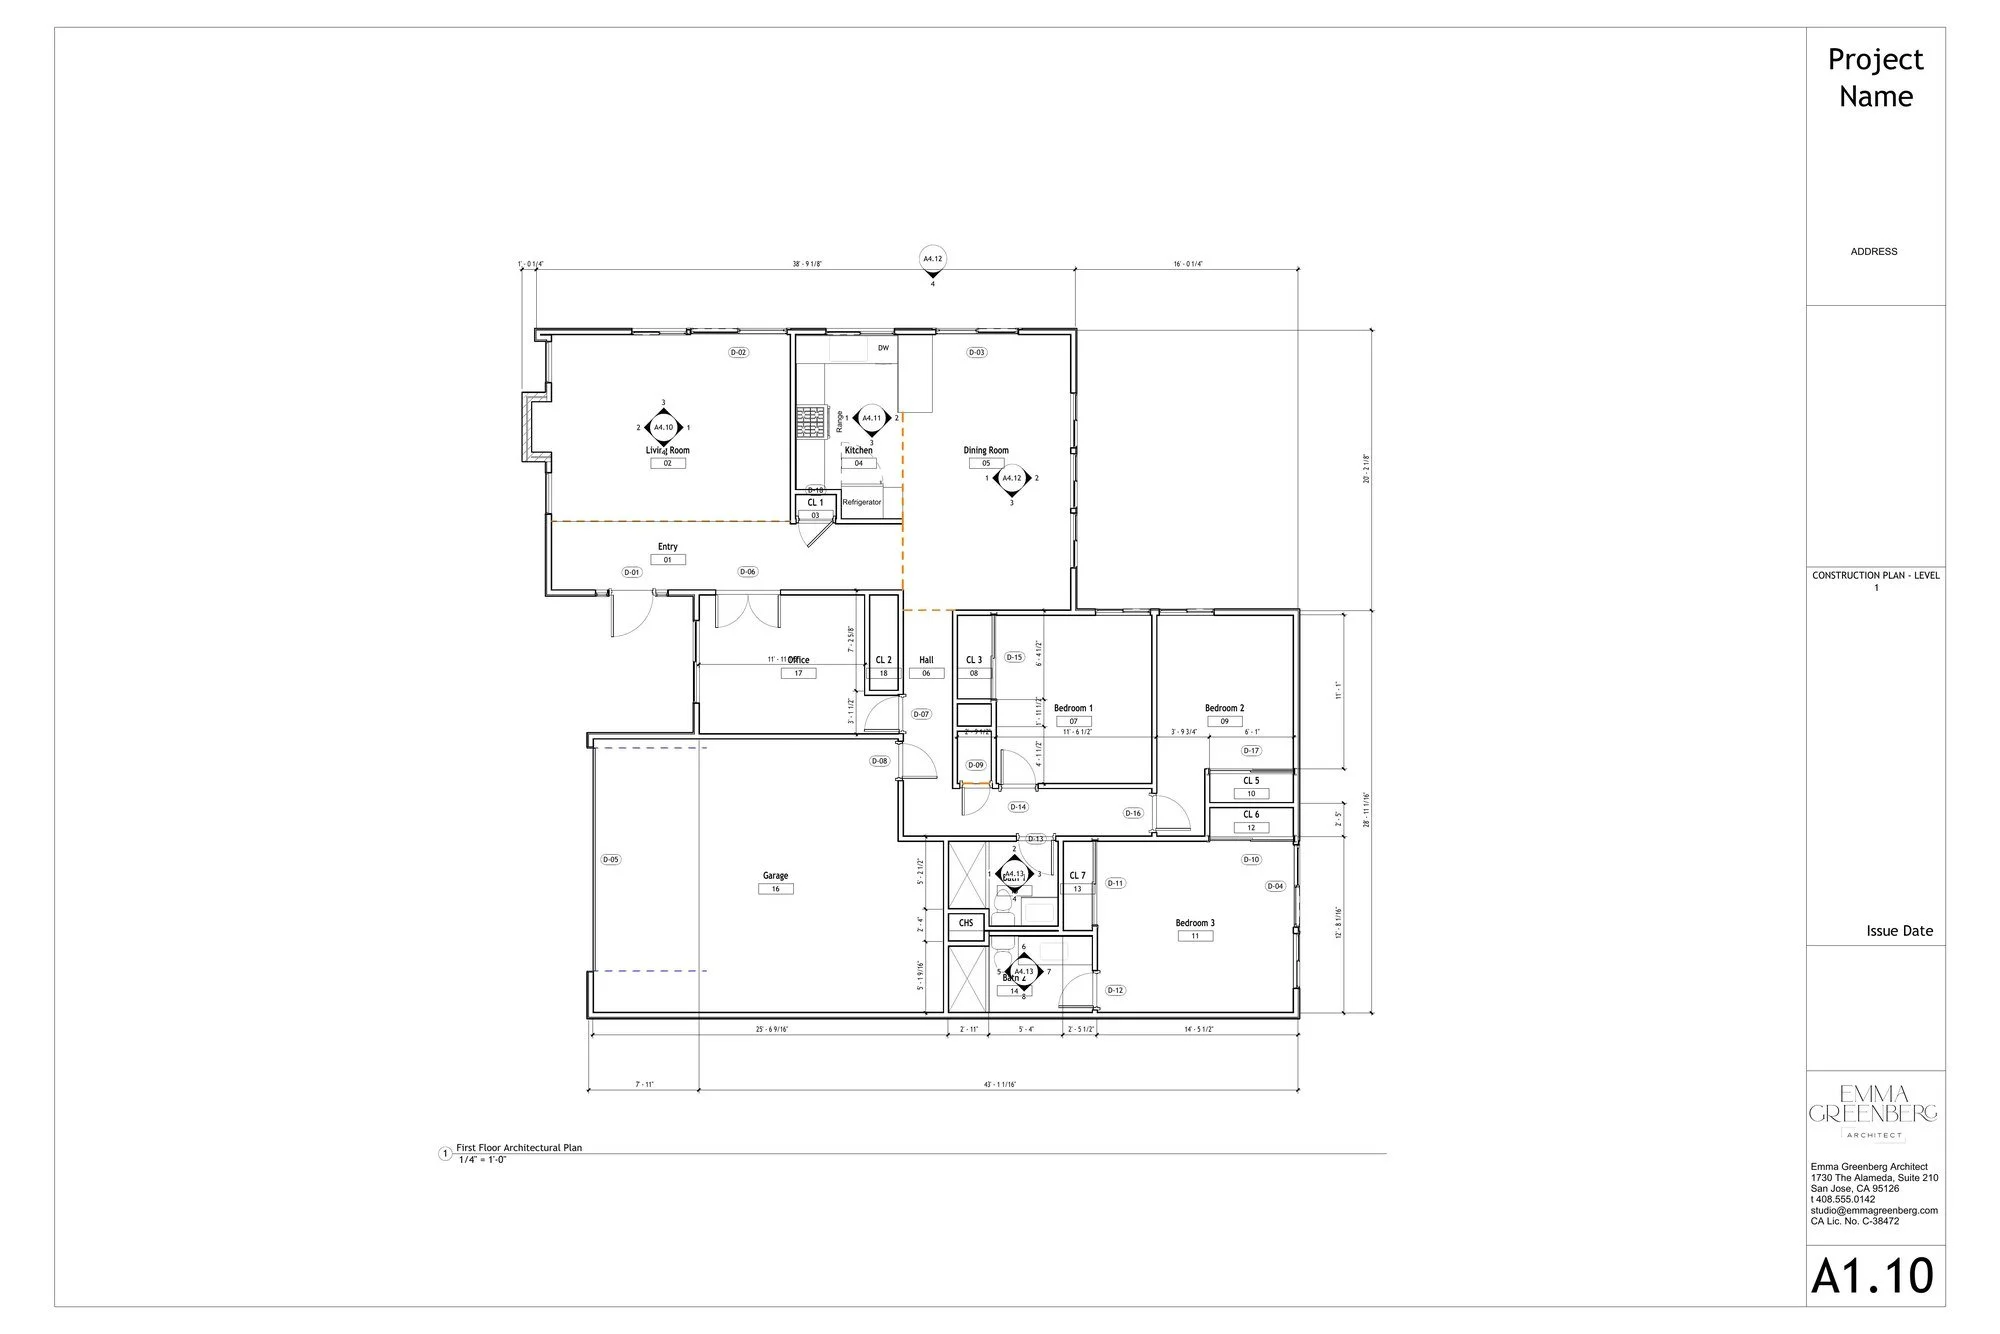
I used SketchProAI to work on a renovation of a home. I drew the existing conditions in Revit. I’m trained on the software but not currently using it, so it took a lot of effort to draw the building. Throughout the process, I found it helpful to ask SketchProAI how to do things to relearn the software. I had SketchProAI create the wall and floor types. One mistake was having it place the floors because it placed them in each room rather than throughout the level. SketchProAI linked a CAD file as a background, but a survey Xref in the CAD file caused the floor plan to be improperly scaled. This exercise wasted a lot of time. I think the best use cases are the predetermined workflows presented during the demo.
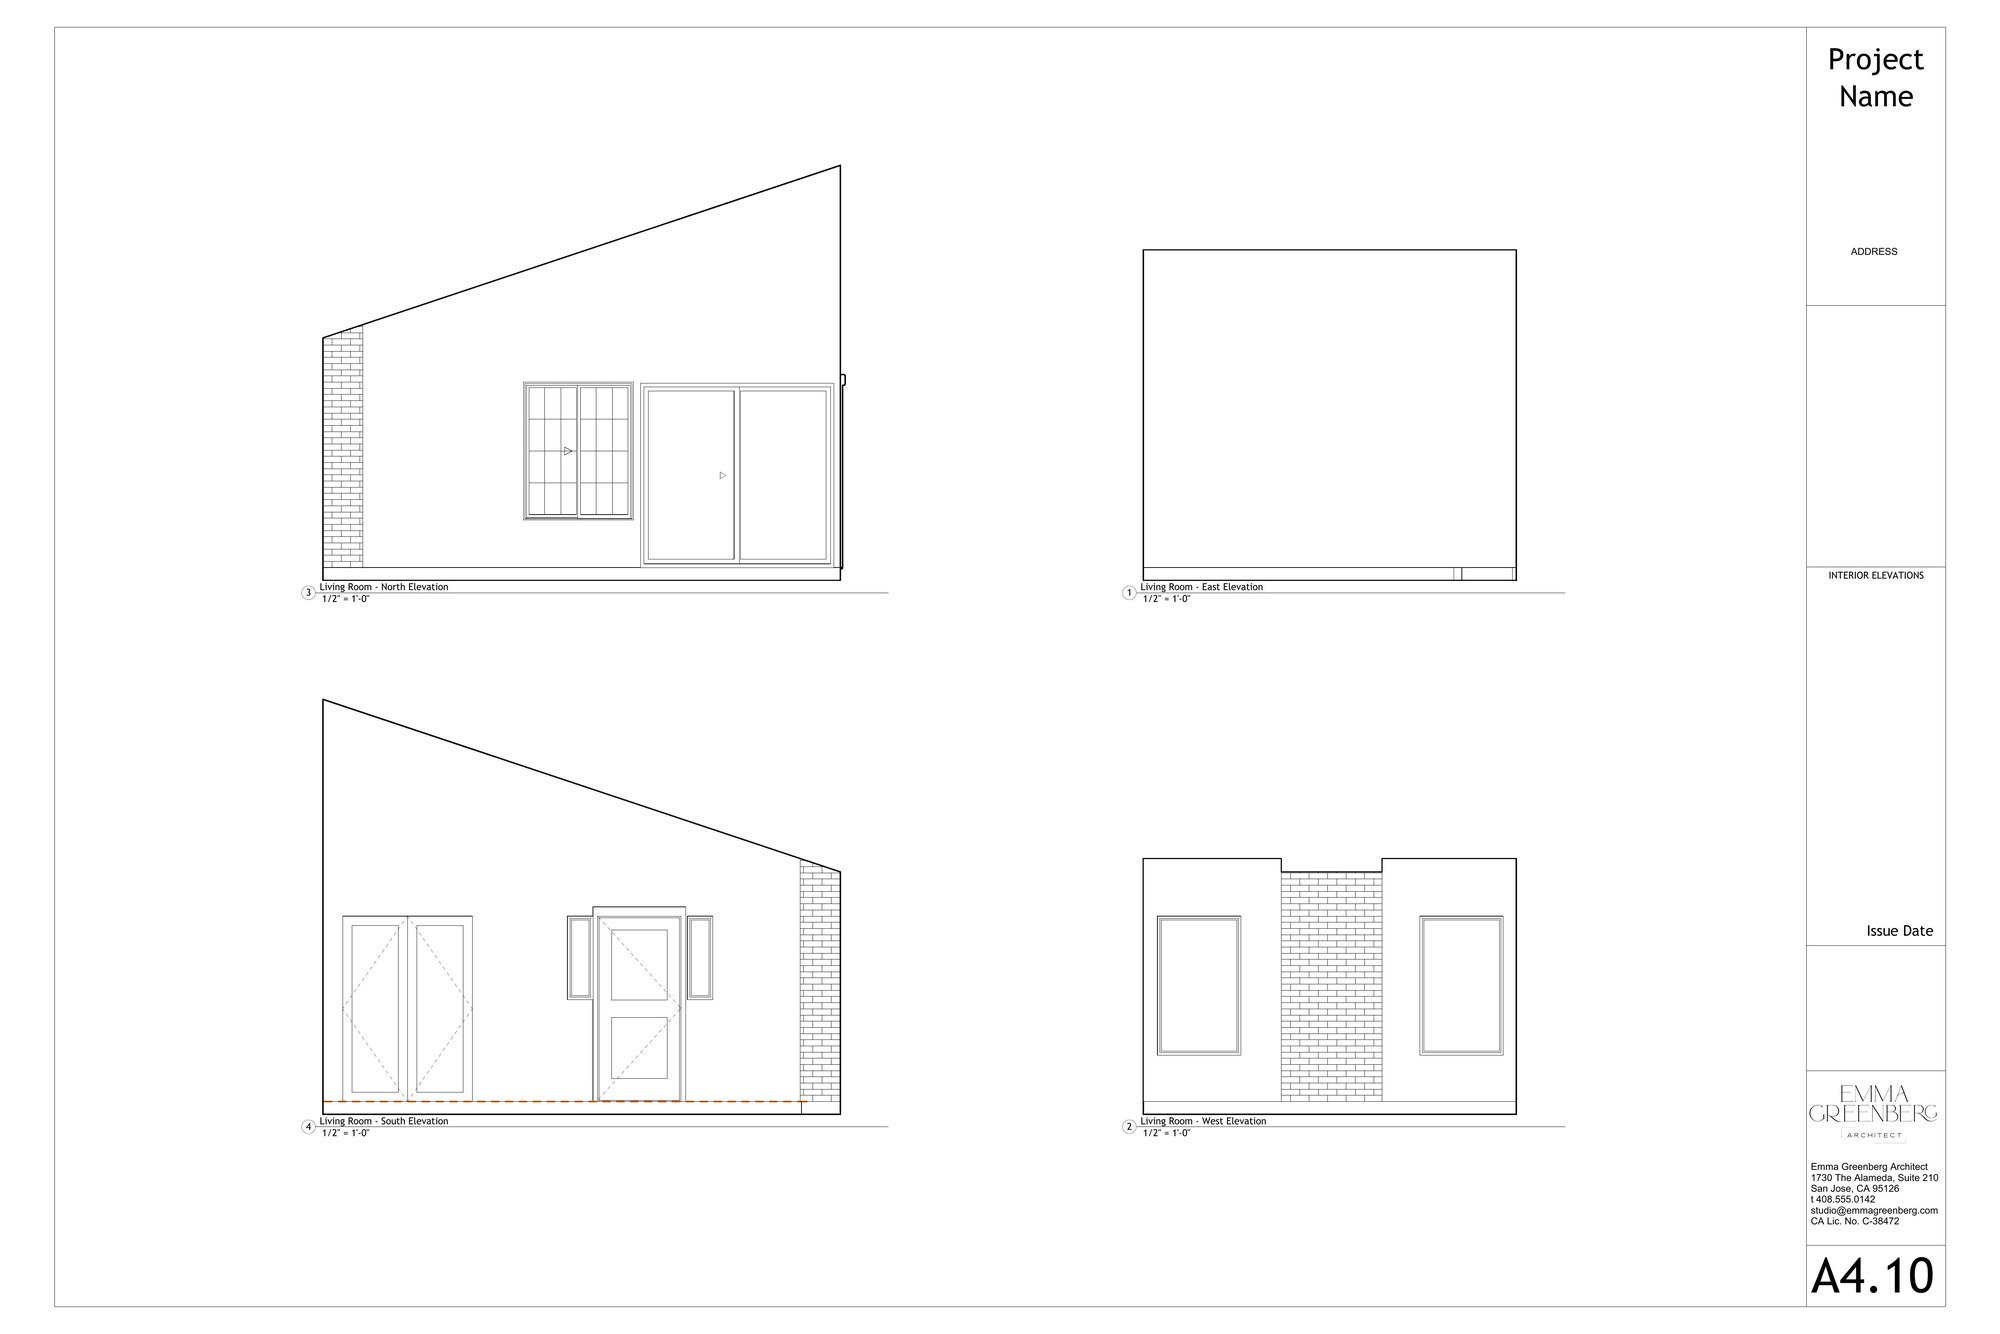
Tasks that SketchProAI worked on:
1. Creating the cartoon set.
2. Creating a title block. The graphic output was not good, but it created the parameters so I could easily edit it. New to Revit, this would have been time-consuming otherwise.
3. Tagging the rooms and aligning the tags graphically.
4. Tagging the doors to follow a particular logic, for example, starting with the exterior at the entry and going clockwise. I created an agent from this workflow.
5. The window tag wouldn’t load and I didn’t take the time to troubleshoot it.
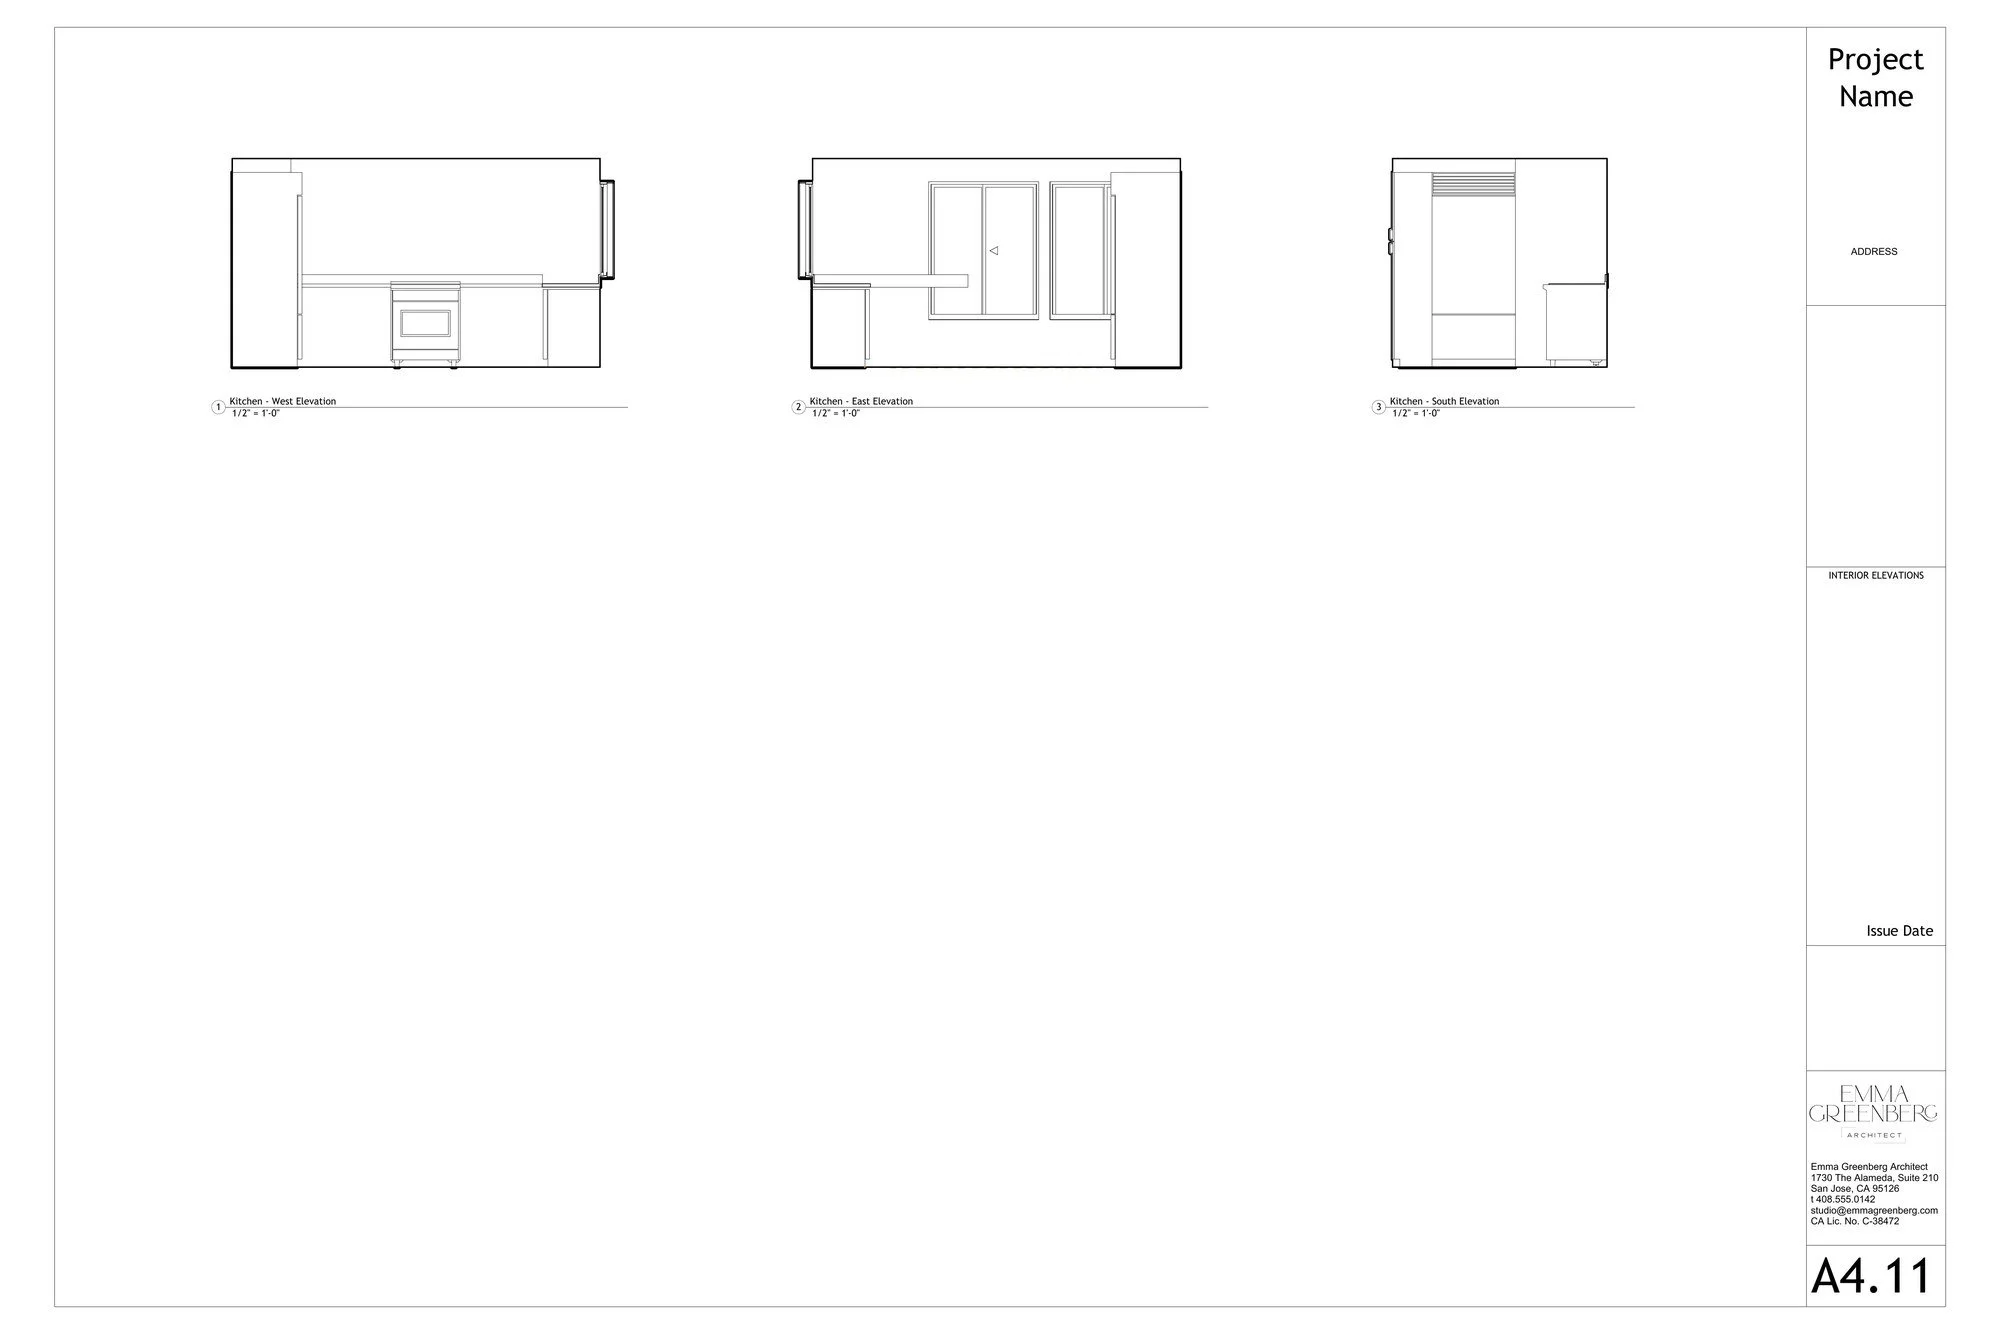
Tasks that SketchProAI worked on:
6. Dimensioning. This was challenging. It dimensioned to the stud on the interior but not on the exterior. It could only dimension to show the thickness of the stud, rather to its north or east face. It helped to break the task down into parts and sketch on screenshots to clarify prompts. I could not get SketchProAI to dimension as I wished, so I manually overrode it.
7. Interior elevations. I had SketchProAI set up interior elevations. It first set up the sheets at 1/4” scale. I requested that they be changed to 1/2” scale, so SketchProAI had to reorder and number them. I had SketchProAI properly distribute the elevations. I had it create masking regions to tidy them and hide the cuts. Done manually, these tasks are very time-consuming.
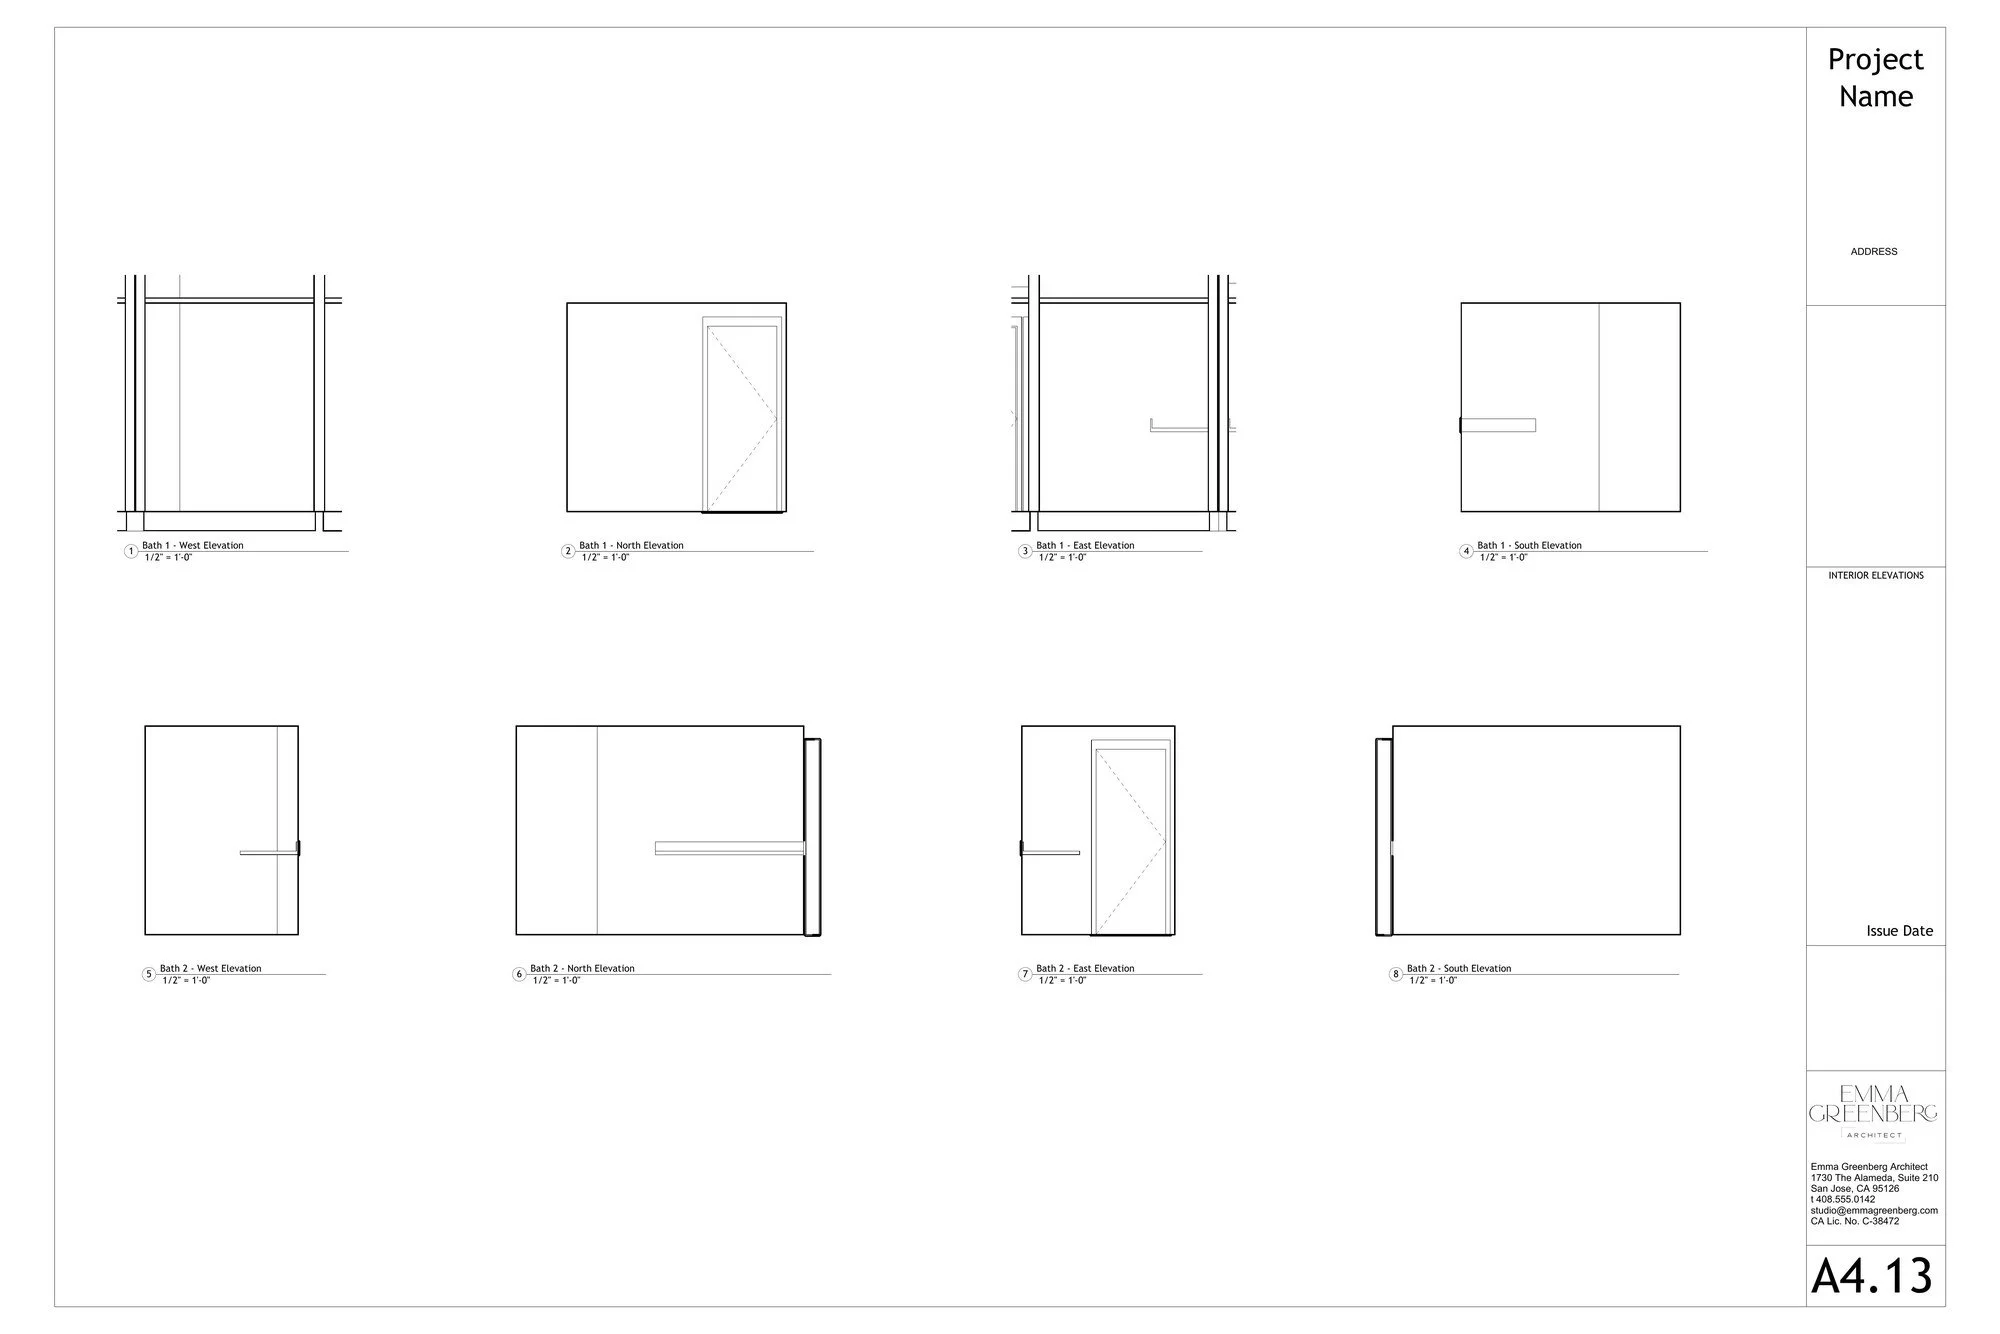
I completed a staggering amount of work in a day compared to what I could have done manually. I was able to multitask while SketchProAI executed tasks. Usually when I’m doing drawings, I need to be completely focused for accuracy. I would need to build quality-review checks into the workflow because it is so hands-off. Tasks like dimensioning, while time-consuming, illuminate errors or conflicts in the design. Speed contends with accuracy.
Also, by dividing your workflow into distinct tasks and training the AI, you are purposeful about the rules surrounding the work. It gives you the ability to take that data and create an SOP for a future employee, rather simply than using past sets as examples.
ASSIGNMENT 6: Animate your Story
Translate the pavilion into an animation generated with AI video tools from the project's own renderings, then refined in editing software for sequence and emotional resonance.
TOOLS
RunDiffusion, CapCut